The post settings menu in the editor allows you to prepare your content for publishing with tags, post access levels, meta data and more.
Below, you'll find everything you need to know to make sure your content is optimized and ready to share with your audience.
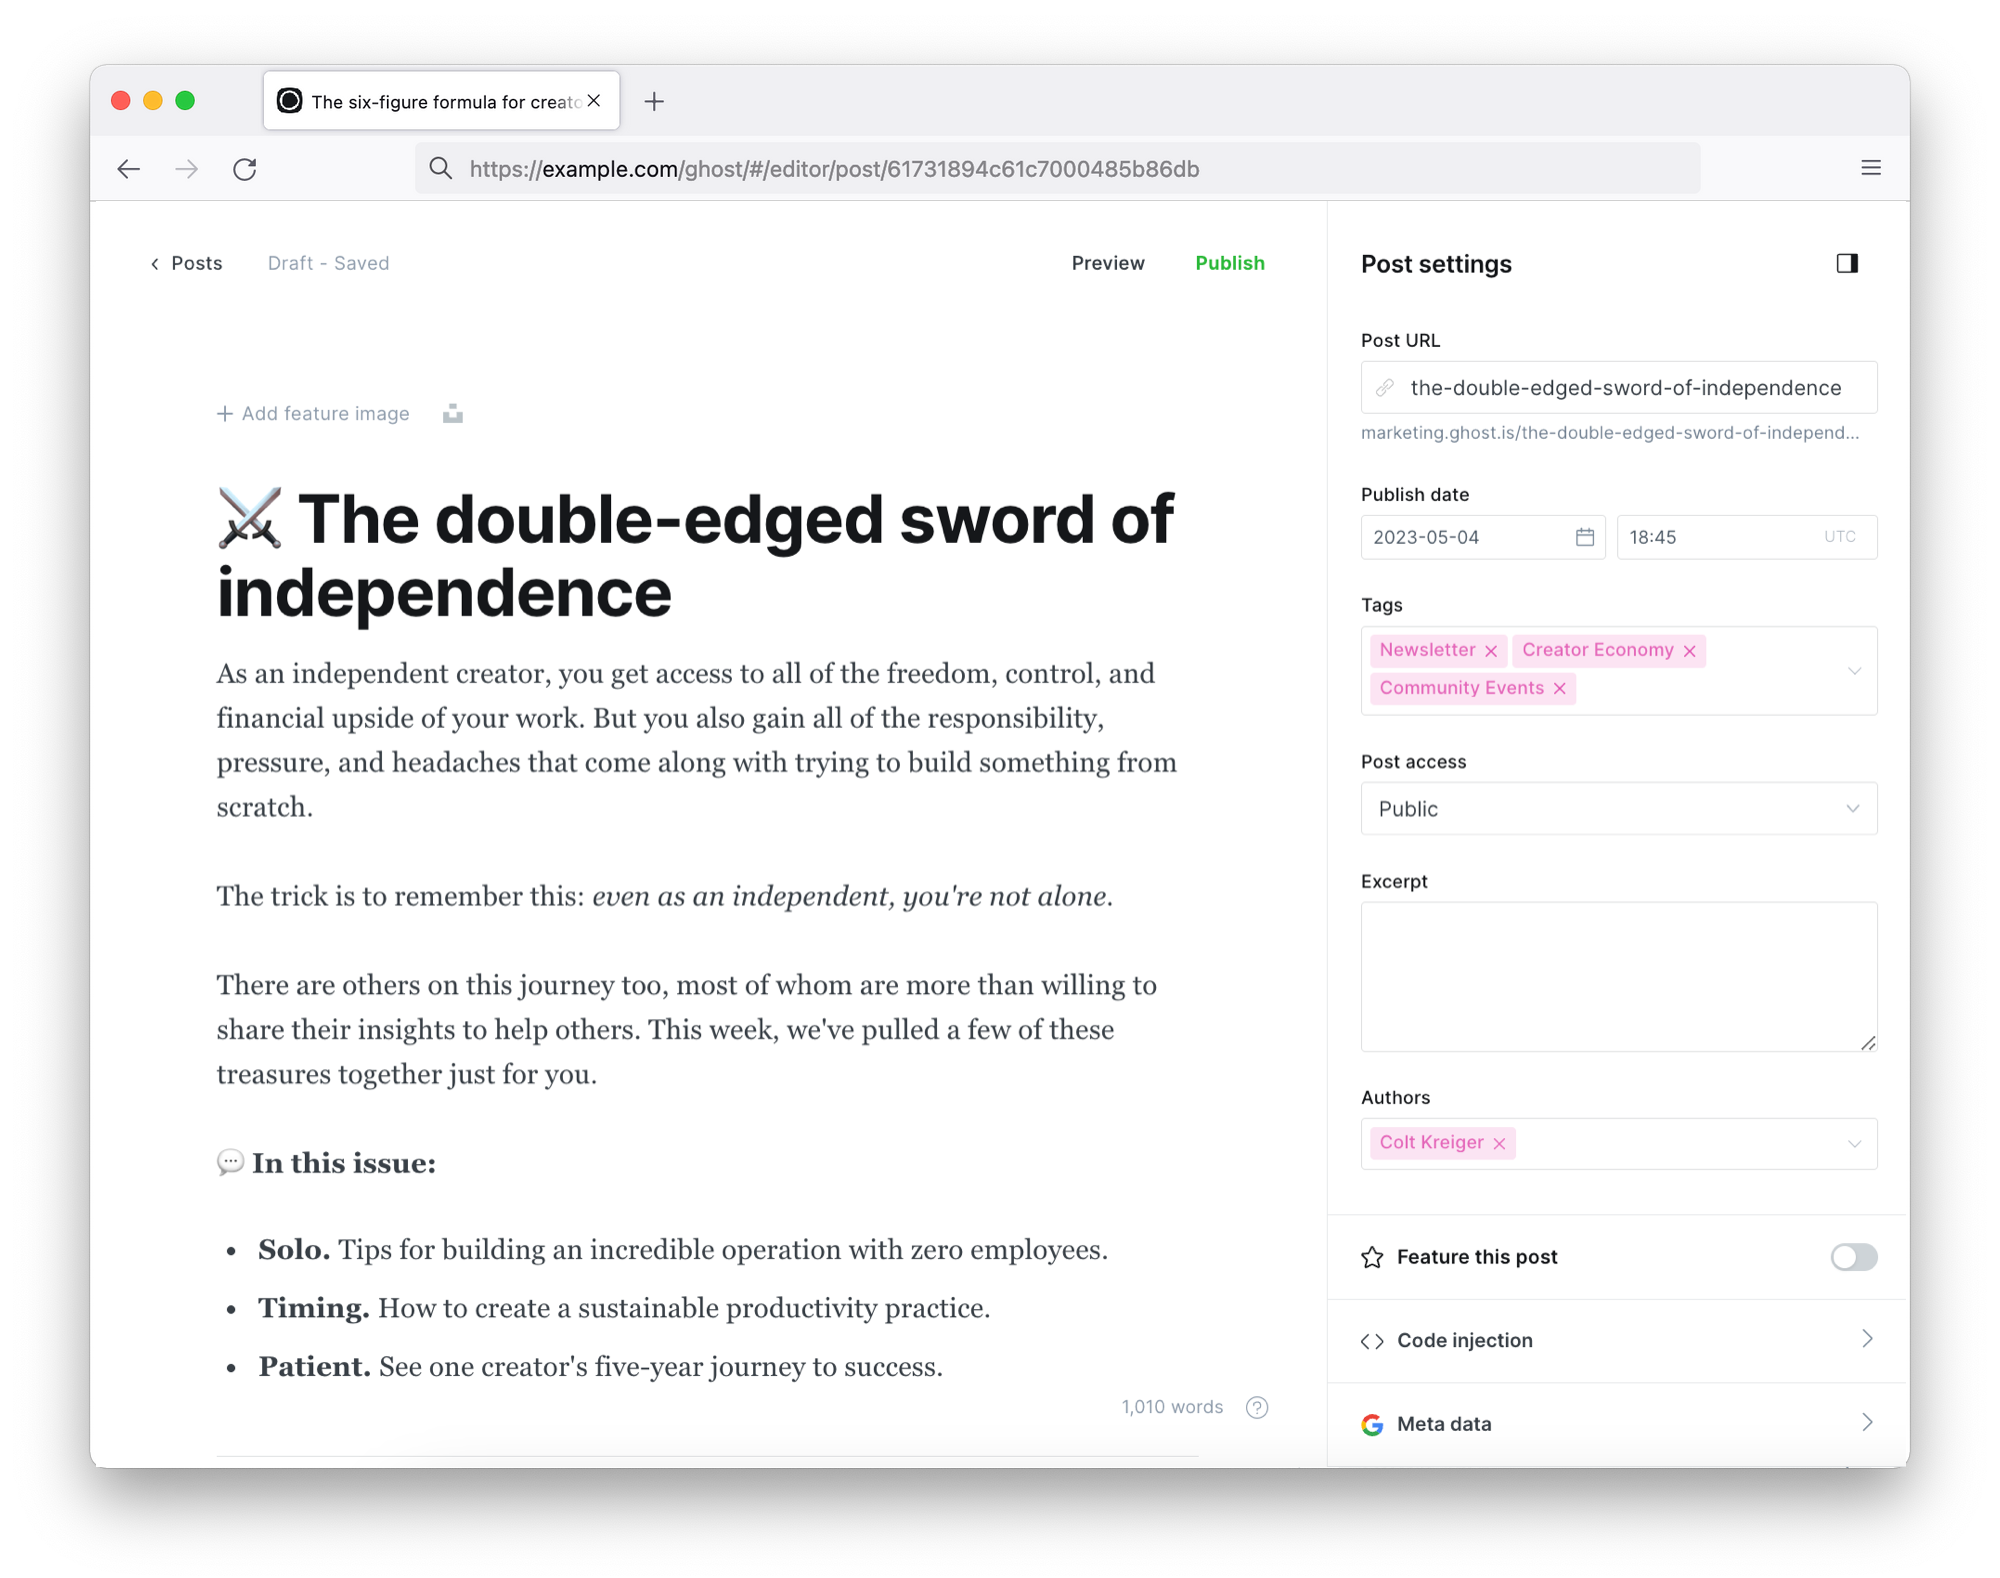
Post URL
Ghost uses the title of your post to generate a post URL by default, or you can customize this URL to anything you like.
Best practice: keep your URL slug on topic and make it as short as possible, using hyphens - to separate words.
Publish date
The publish date uses your publication timezone settings and will be determined when you publish or schedule your post by default. You can change the publish date at any time after a post has been published.
Best practice: Update your publishing date when you're republishing a post with fresh content or would like to change the order the post appears on your site.
Tags
To add tags to your post, click inside the tag field and begin typing. If a tag already exists, it will populate the drop-down, or you can add new tags from here.
Best practice: Tags can be customized with their own metadata and styling from the Ghost Admin. Read more about organizing your content in Ghost.
Post access
The post access menu is where you can decide who gets to access your content, and can be determined on a per-post basis.
- Public — posts are available to all visitors.
- Members only — posts are only available to logged-in members, both free and paid.
- Paid-members only — posts are only available to paid members that have an active subscription in Stripe.
- Specific tiers — posts are available to paid members on selected Tiers.
Best practice: Many publishers use public content to attract new visitors and grow an audience, and protect premium content for logged-in members. Read more about content protection in Ghost.
Custom excerpt
Custom excerpts are a great way to introduce your content. If your theme supports it, the custom excerpt will show a snippet of content at the top of your post, and on your content index page.
Best practice: Your excerpt should provide a concise summary of your post that flows into your first paragraph nicely.
Authors
By default, Ghost assigns post authorship to the logged-in user creating the post. You can also add multiple authors to a single post.
Custom templates
If your chosen theme makes use of custom templates, you will see a field that allows you to select a template for each page or post.

Featured post
If your theme includes functionality to feature specific posts, give them special styling, or place them into a carousel on the homepage, you can define your featured posts with this toggle.

Post History
Ghost stores multiple versions of your posts as you edit them (behind the scenes), and individual edits can be restored, if you make a mistake or lose a portion of your work.
Meta data
This section allows you to enter custom meta data which can be accessed by search engines and used populate dynamic links when your content is shared across the web.
Best practice: Keep the meta title and description within the recommended character limit and write it for humans. Your meta data is what helps people decide whether to click on your article or not.
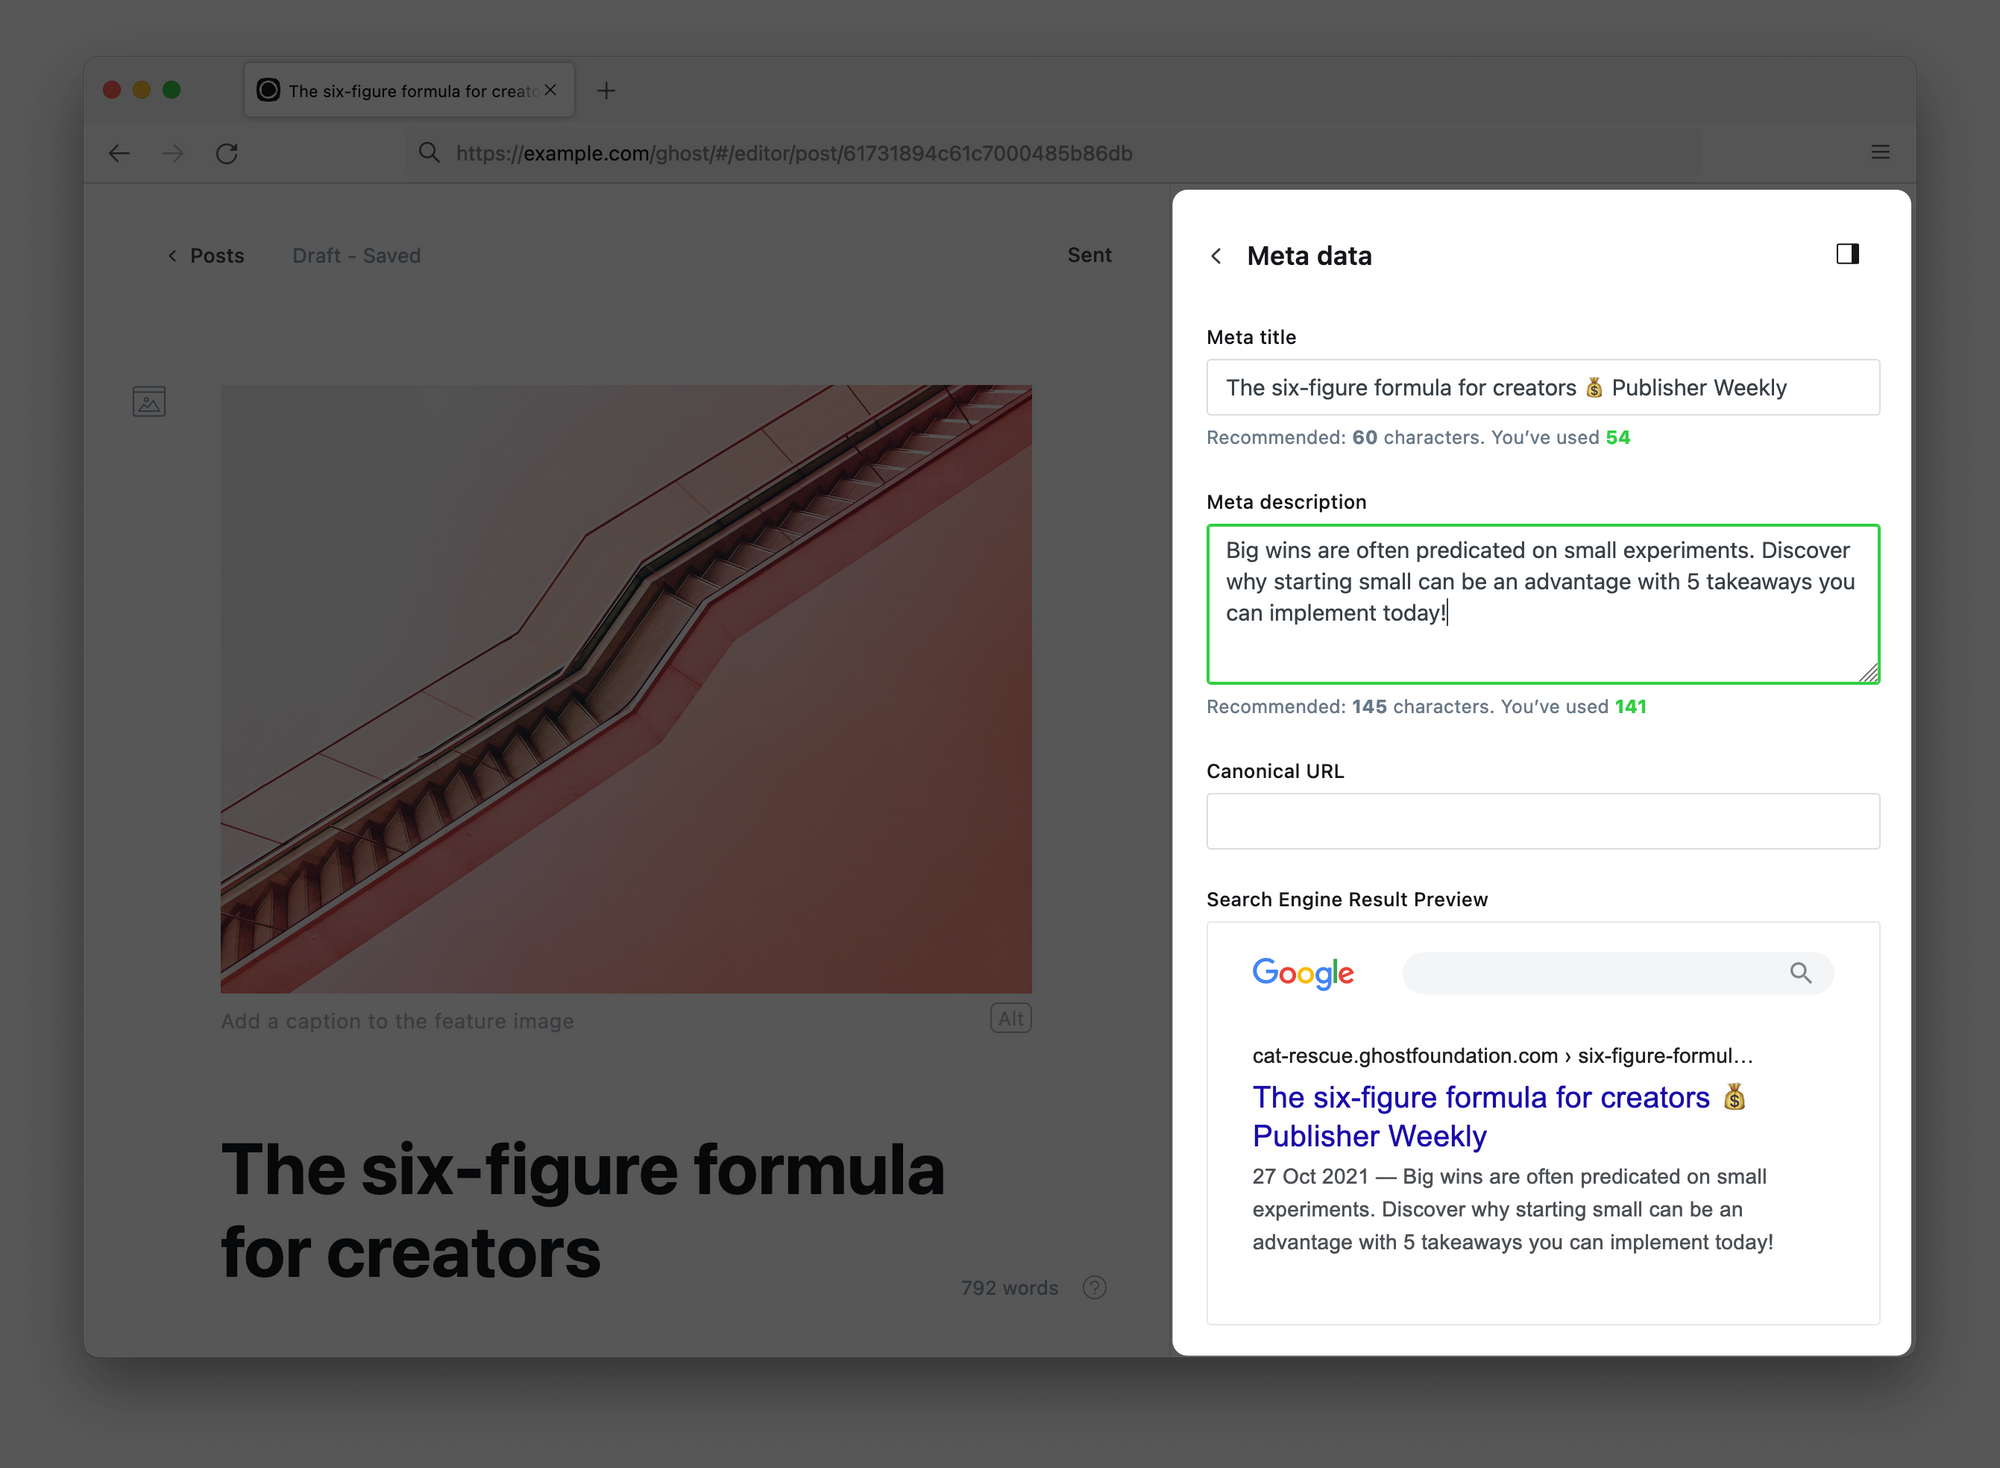
The Canonical URL field can be used to override the automatic canonical for the post, if you're publishing a guest post that has been published on another website, or working with duplicate content. Read more about when to use the Canonical URL field.
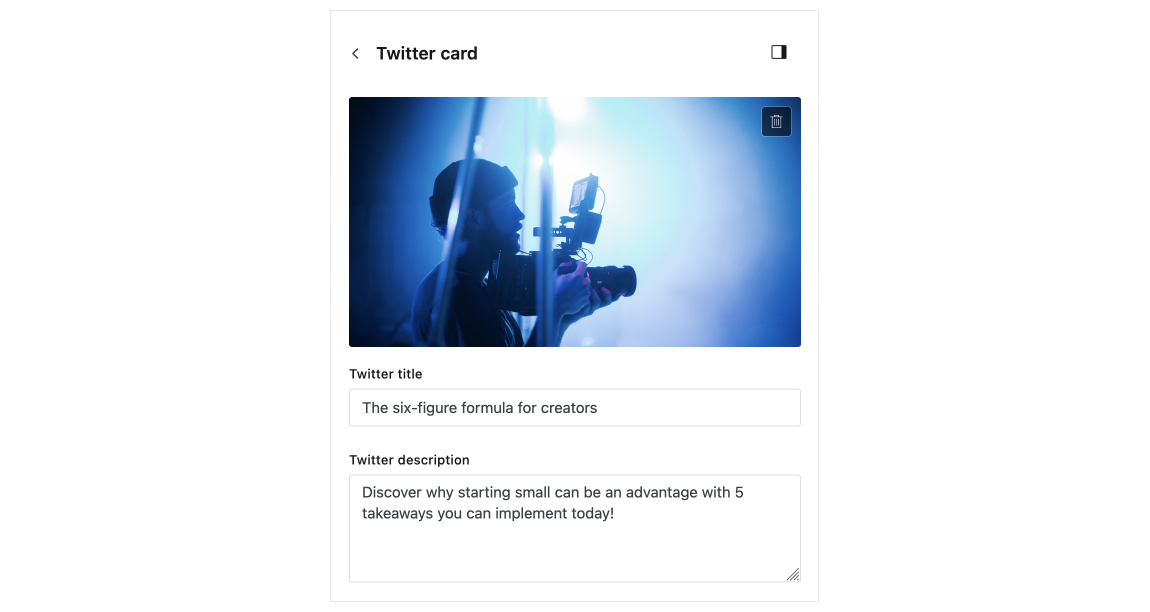
X card
It's possible to set customized structured data for X (formerly Twitter). If the X data is not set, the custom meta data is used.
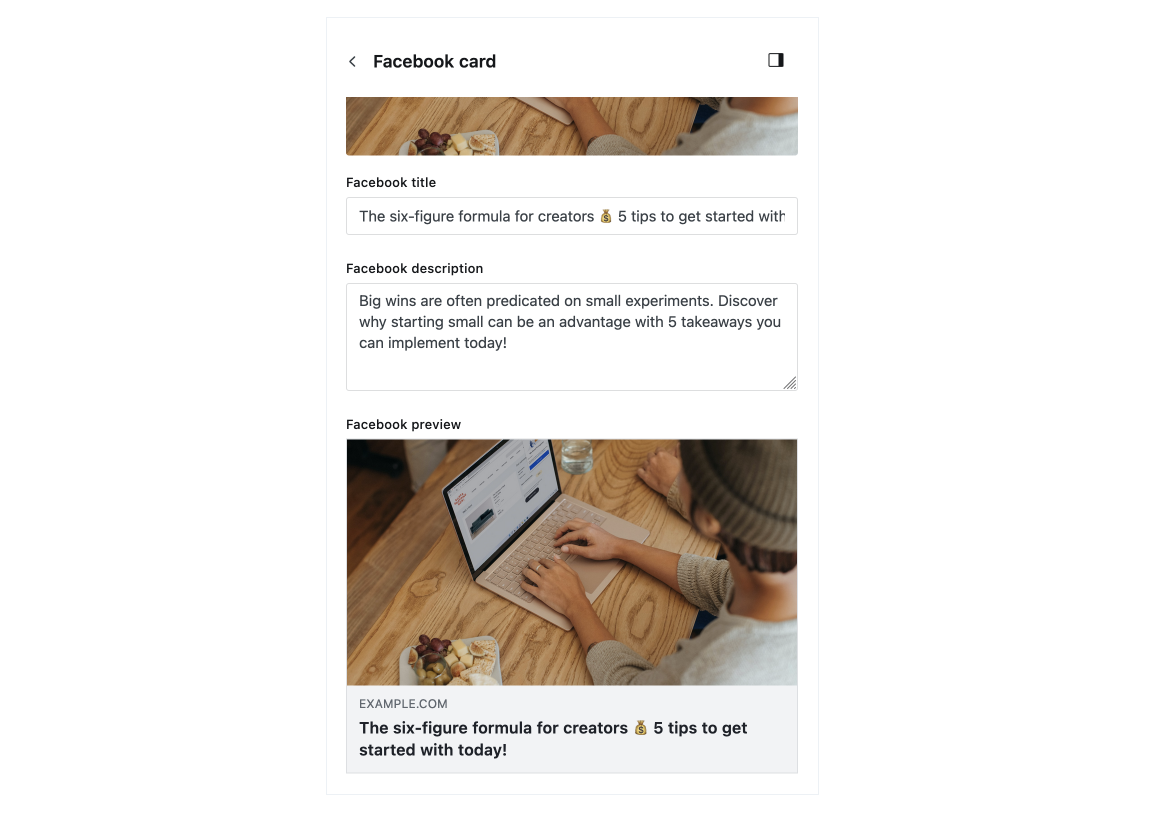
Facebook card
Add custom data for Facebook Open Graph for sharing your post on the Facebook platform.
Tip: Facebook caches the Open Graph data for your post when published. To update this for a published post, use the Facebook Sharing Debugger.
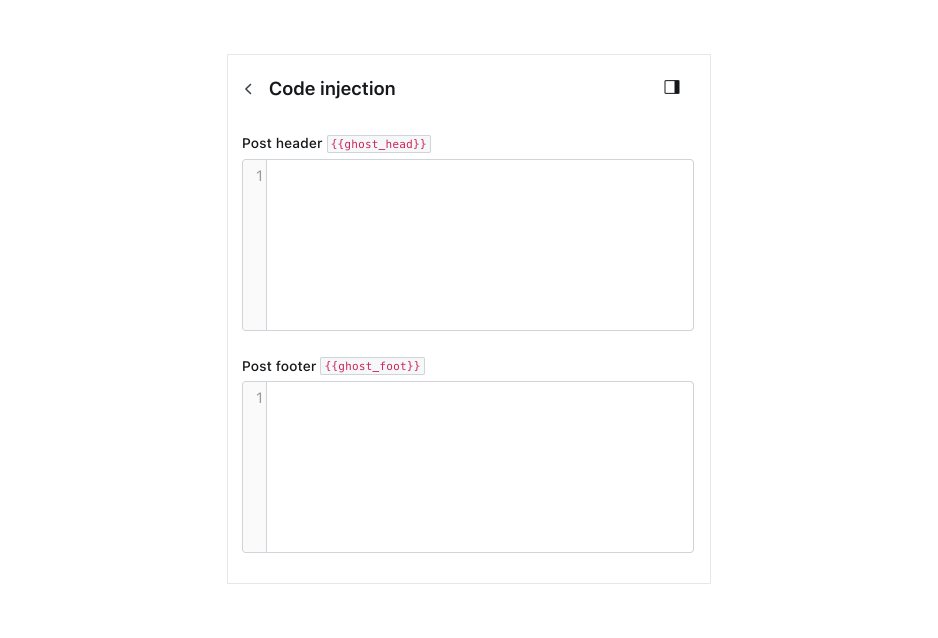
Code injection
To include custom scripts or styles in your post, use Code Injection. Custom code can be added to the header or footer of the post.
This feature is useful when adding additional tracking scripts to a post or making custom CSS changes that only apply to a single post.