The most important step towards turning your Ghost publication into a membership website is to give visitors the ability to sign up and support your work.
Portal handles the full membership experience for your subscribers and can be added to any Ghost site, using any theme, without needing to write code or edit your theme templates.
Customize Portal settings
To get started, go to Settings → Membership → Portal settings, then click Customize.
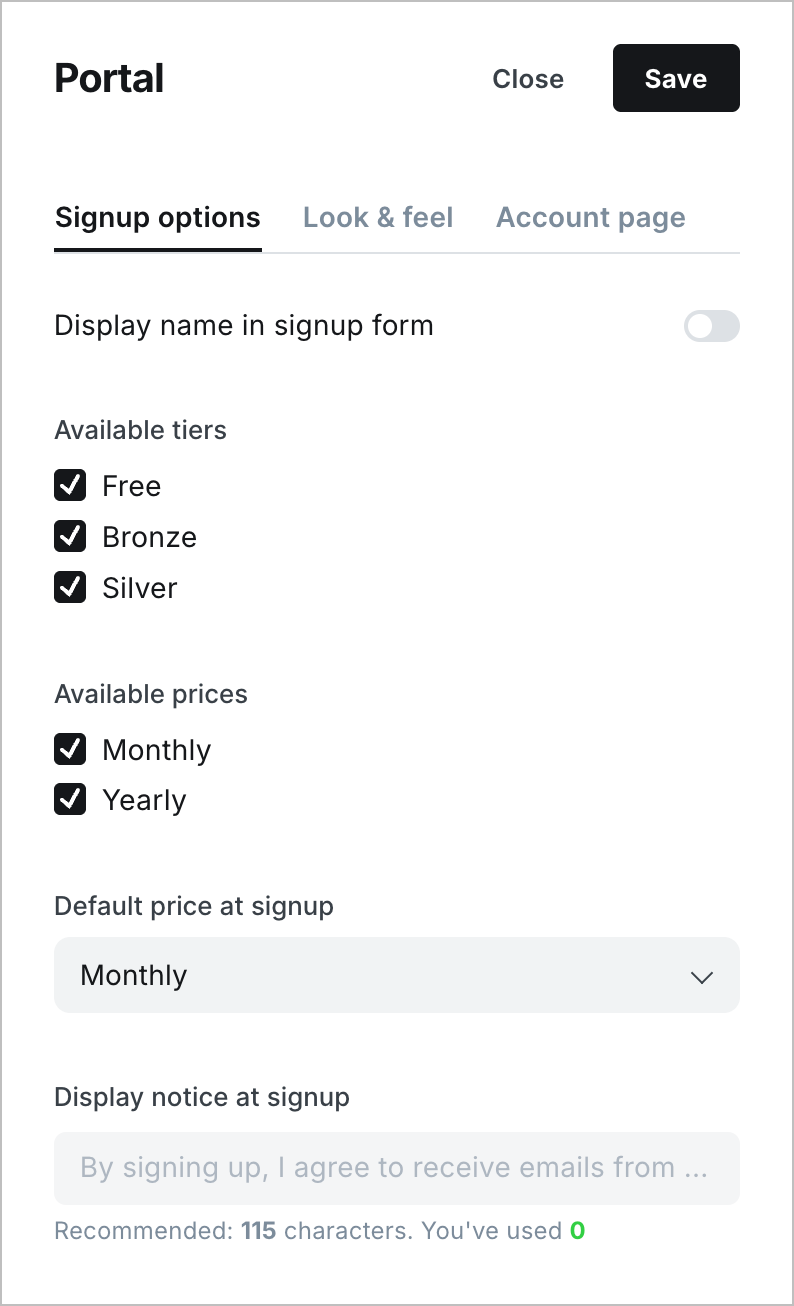
Signup options
Select which plans are available to visitors who want to signup, using any combination of tiers to suit your business. Leave all plans unchecked for an invite-only site, where your visitors have to contact you directly for access.
- Display name in signup form
Toggling this feature on will add a text field in the signup form that allows your members to enter their name in and attach it to their account. - Tiers available at signup
Customize which Tiers are available at signup. For site's that have not connected Stripe yet, this will show the free signup option. Once you have connected to Stripe and added premium Tiers, you can select the Tiers and prices available at signup as well. - Available prices
Select whether monthly, yearly or both pricing options should be available at signup for each paid tier you offer. - Default price at signup
Select whether the monthly rate or yearly rates should be displayed when Portal signup is launched. - Display notice at signup
Include custom text and links to policies that should be displayed at the time of signup, to prompt agreement to your terms of service, or other policies. - Require agreement
If using custom display notice text, toggling this feature on requires members to agree (via checkbox) to your terms of service or other custom notices, in order to become a member of your publication.
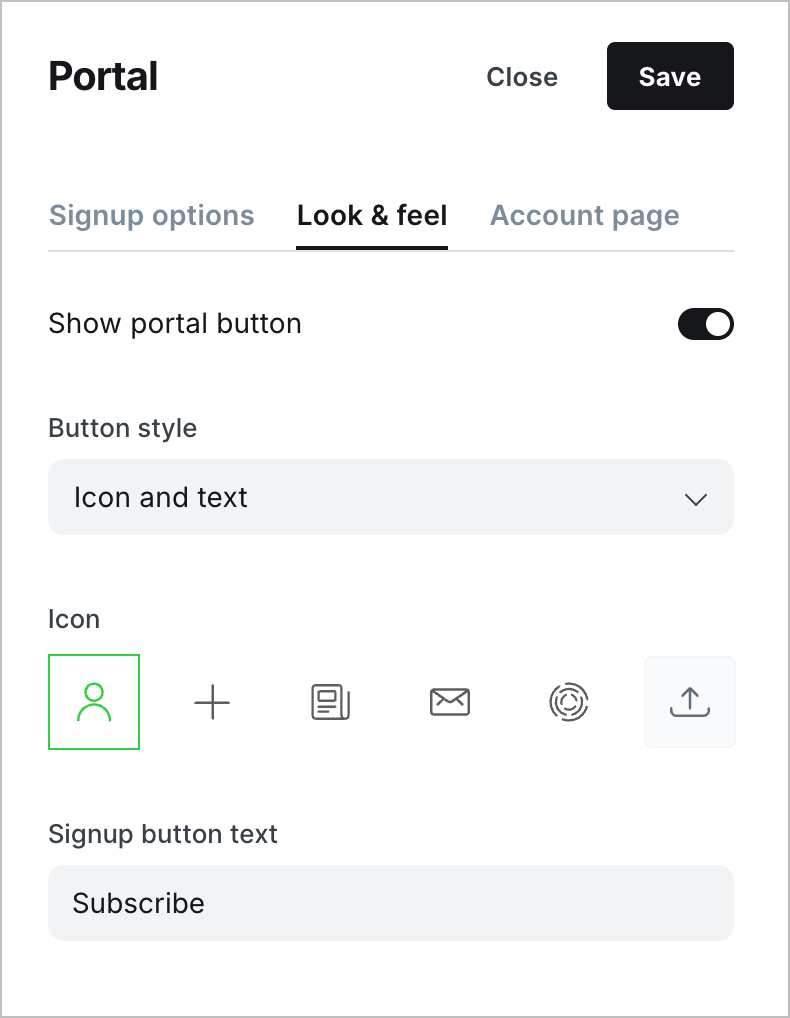
Look and feel
Create a Portal that matches your company brand or publication style. You'll see the Portal screens update in real-time as you make changes. Remember to hit the save and close button when you're finished editing.
- Show Portal button
Shows or hides the Portal button on your publication. Even if the button is hidden, all Portal screens can be accessed using Portal links — more on that below. - Portal button style
Allows you to choose from Icon and text, Icon only, or Text only. - Icon
If your button style includes an icon, this option will be available to you. You can pick from a library of icons or upload a custom icon. It's recommended to use an SVG, PNG, or JPG image no larger than 60px by 60px. - Signup button text
If your button style includes text, this option will be available to you. You can enter any text string.
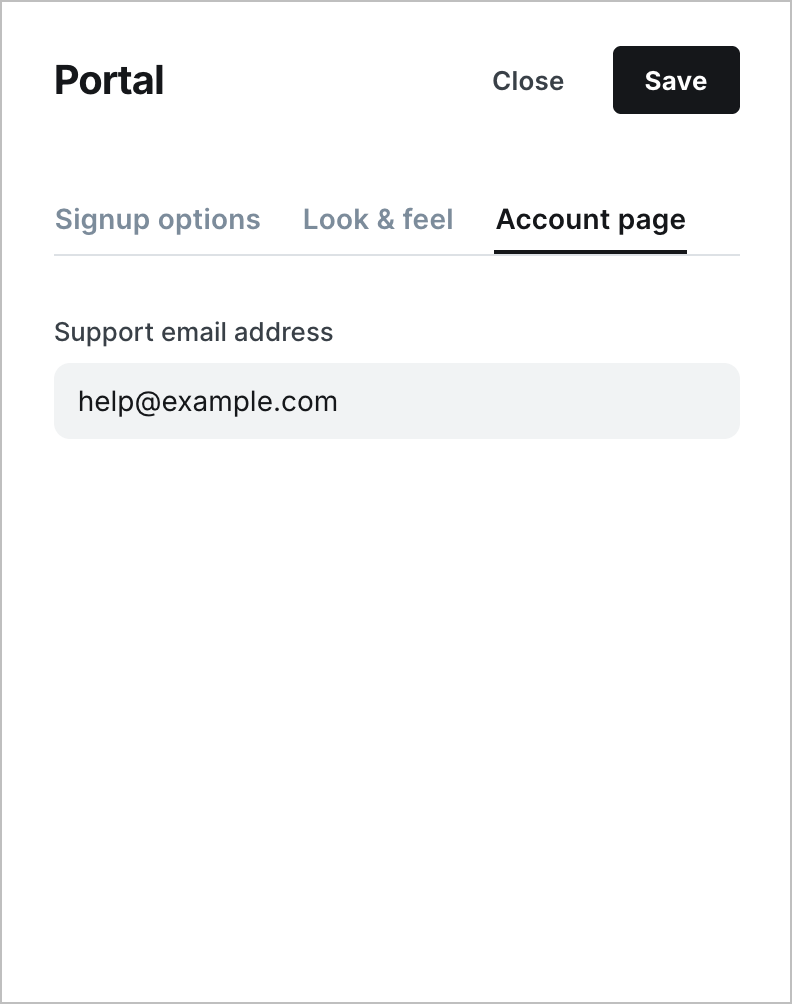
Account page settings
The Account tab in your Portal settings shows a preview of what the account page will look like for your members. From here, members are able to manage their own account and subscriptions as well as reach out to you for support.
- Support email address
This is where members can reach you for help with their accounts and is publicly available on your site, within the Portal interface. By default, anoreplyemail address is configured. It is recommended to set a custom support email address where your members can reach you if they need assistance with their account.
Portal links
The Portal links section displays a list of links that you can use to add direct links to your site that open the Portal experience.

You can use these links in posts and pages. For example, adding a link to https://yoursite.com/#/portal anywhere on your site opens up the Portal window.
You could add this to a text link, turn an image card into a link, or you could add a custom button using the button card in the editor, to link directly to Portal, or a specific tier potential members can subscribe to.