How to setup and manage your Stripe account
Configure your Stripe account to work with Ghost, from custom branding to payment receipt emails.
Subscription-based businesses benefit from a revenue source that is predictable and sustainable, which is why so many online companies gravitate towards this model.
Most publishers who use subscription commerce to generate revenue from their content use Stripe to power their subscriptions and payments. To help your business run smoothly, we've provided some essential tips for managing your Stripe account effectively.
How Stripe subscriptions work
Stripe is the leading online payment processing service for internet businesses. It allows companies of every size to accept payments and manage customer data.
When using Ghost to run a subscription-based business, you benefit from a native Stripe integration that allows you to connect your Ghost publication to your Stripe account in a few clicks.
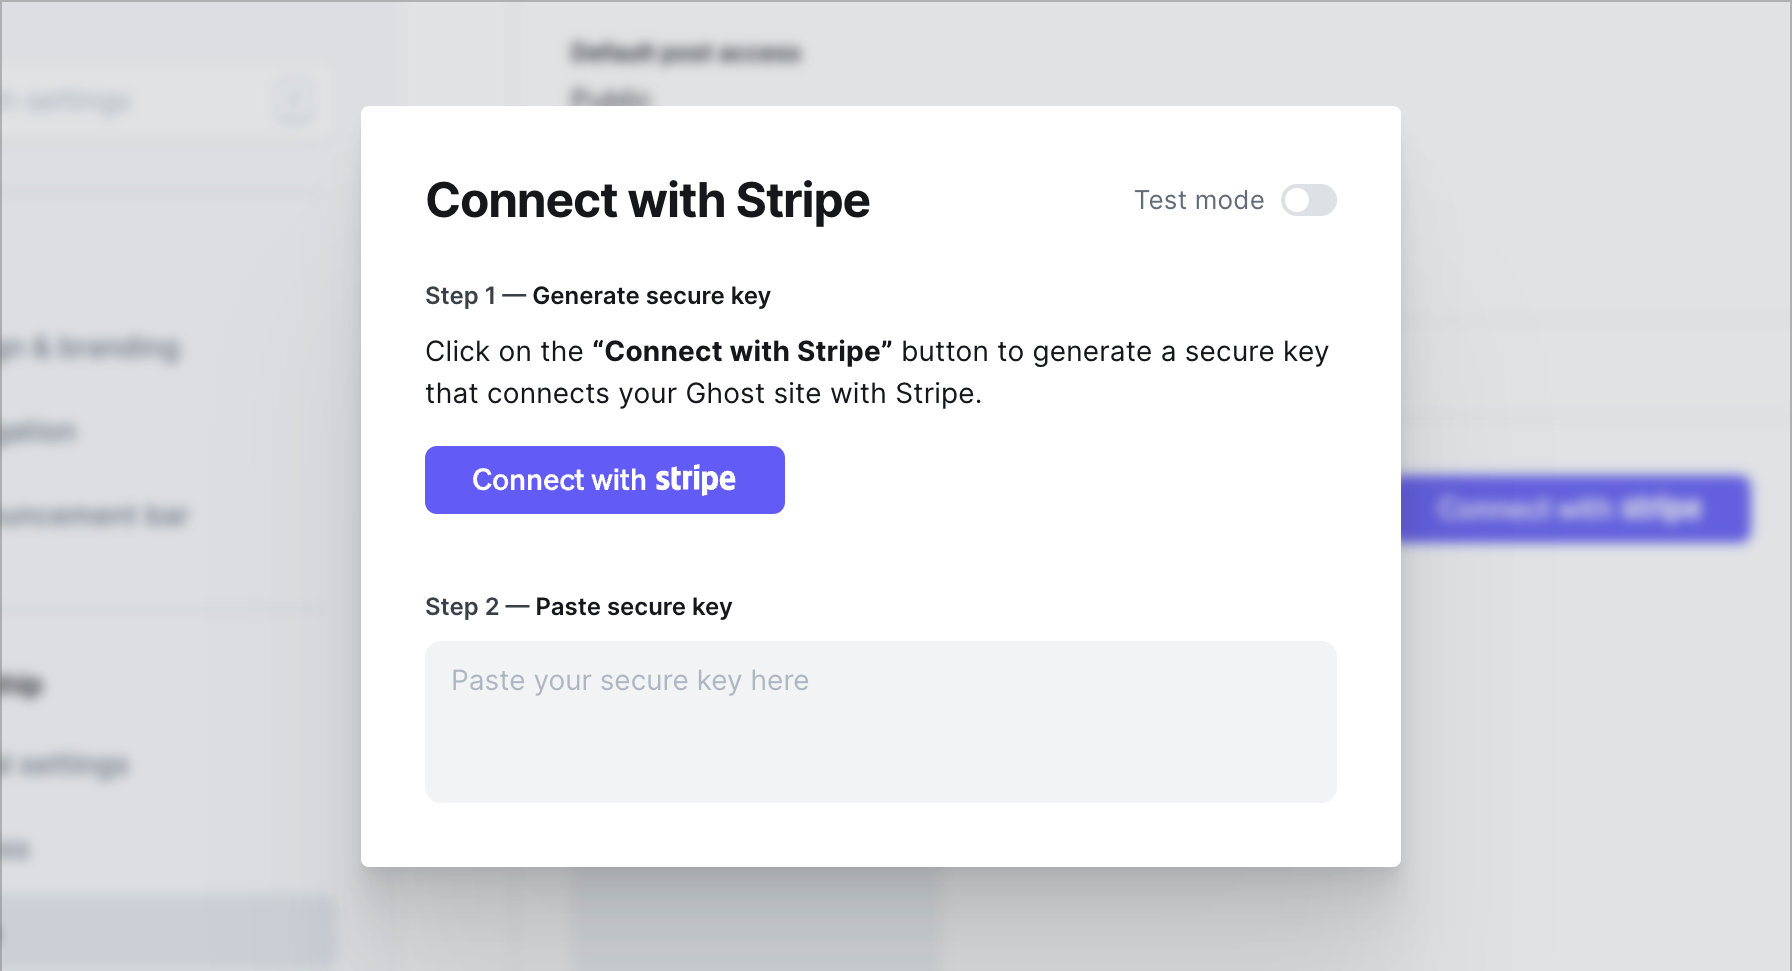
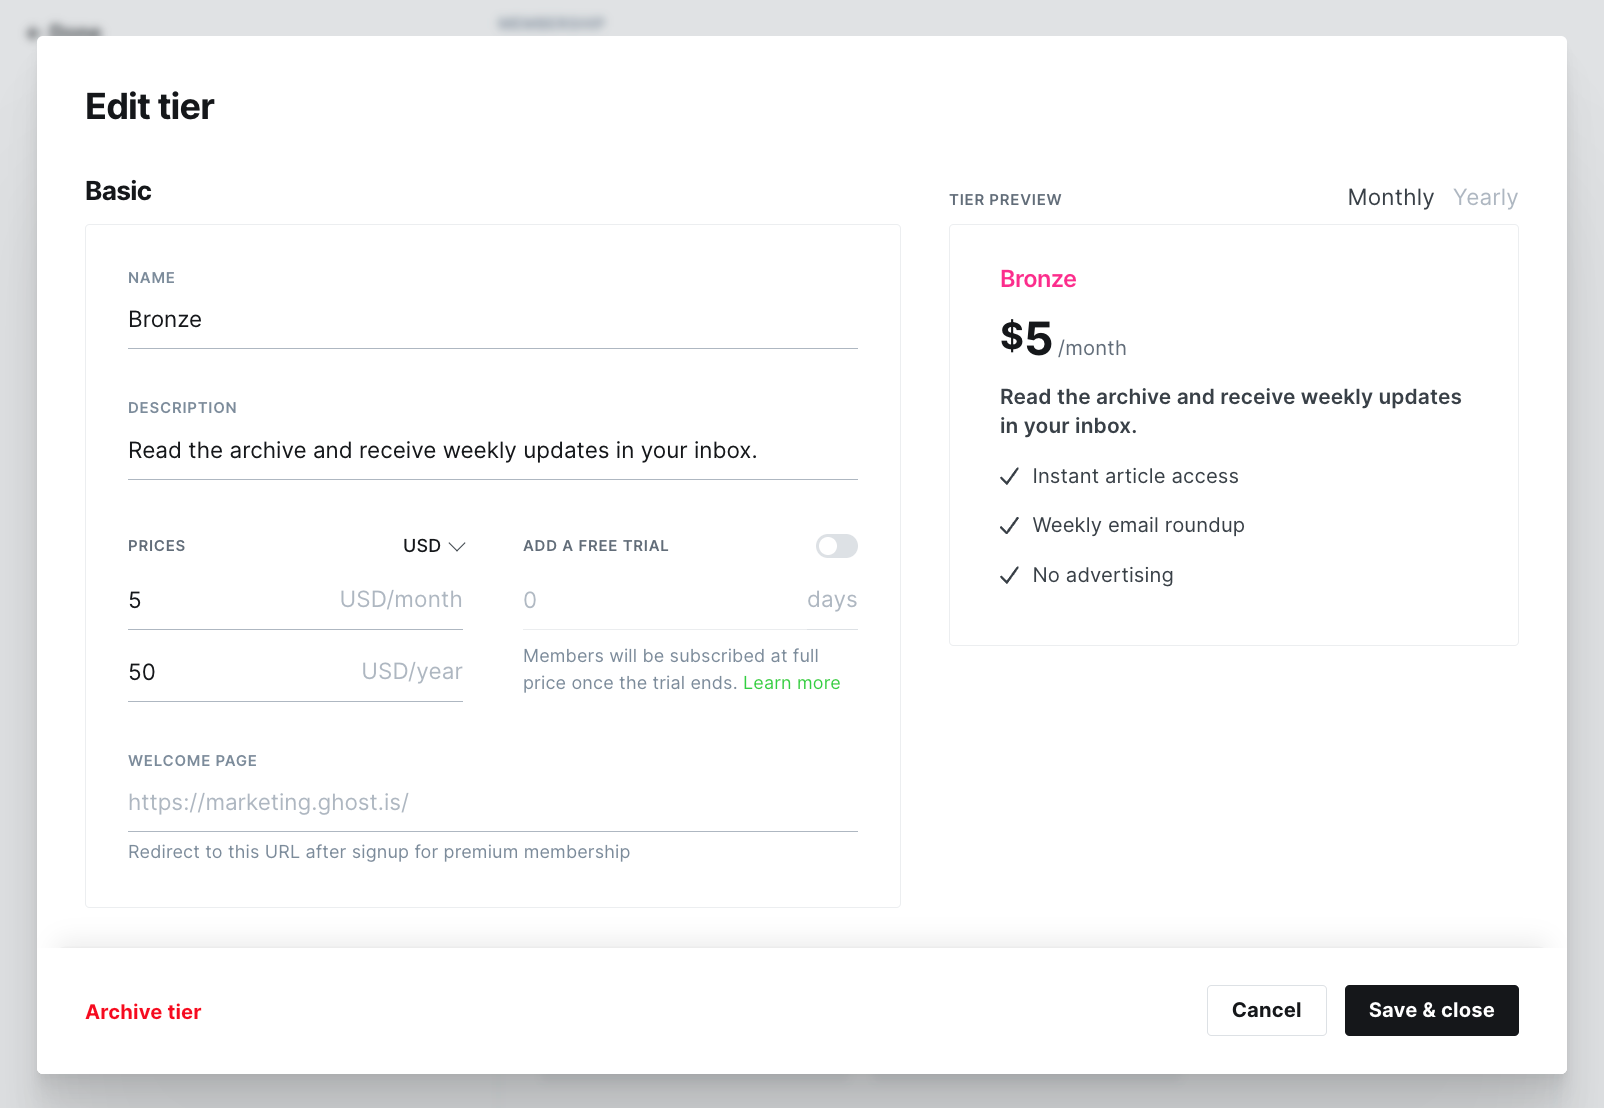
Once Stripe is connected, you can create premium subscription prices directly inside Ghost Admin — these products and prices will be automatically added to your Stripe account.
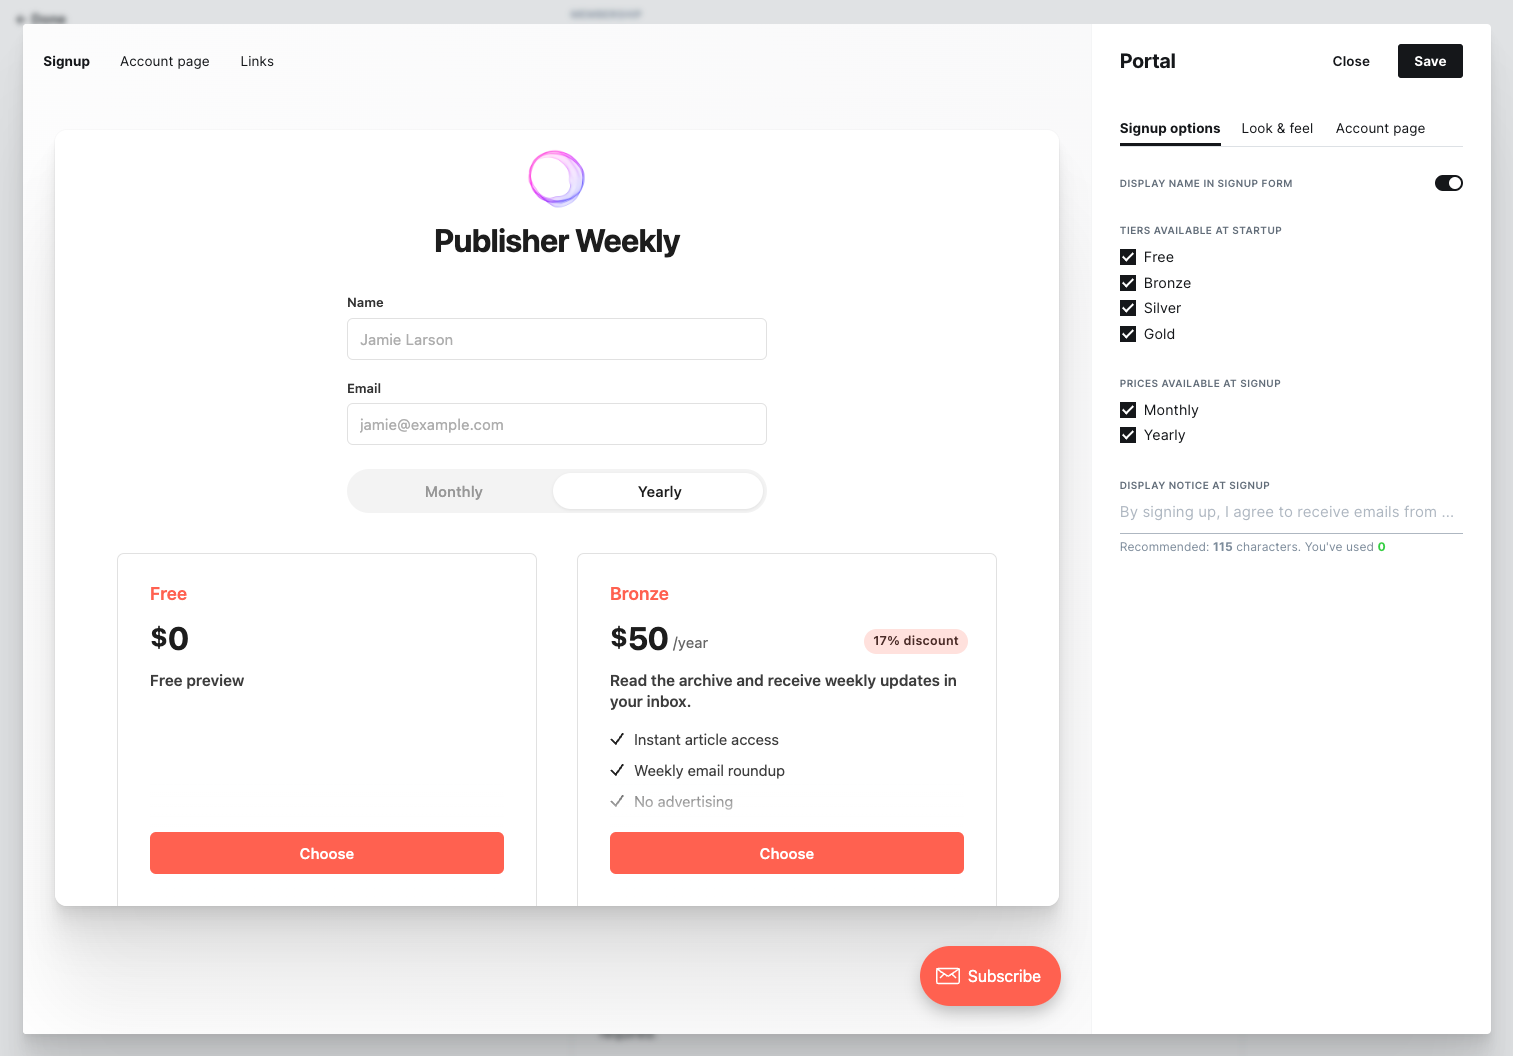
From here, you can configure Portal to display your subscription products on your website and invite your audience to support your work financially.
This setup process makes starting a subscription revenue business accessible to all — whether you’re a solo creator, an indie publisher, or a small team.
Next, you’ll want to understand how to get the most out of your Stripe account so you can maneuver support requests, handle taxes, and understand your business metrics.
Fortunately, plenty of Stripe features and integrations can help you do this, and many are often missed or overlooked, so let’s dive in.
#1 Add branding to the checkout page
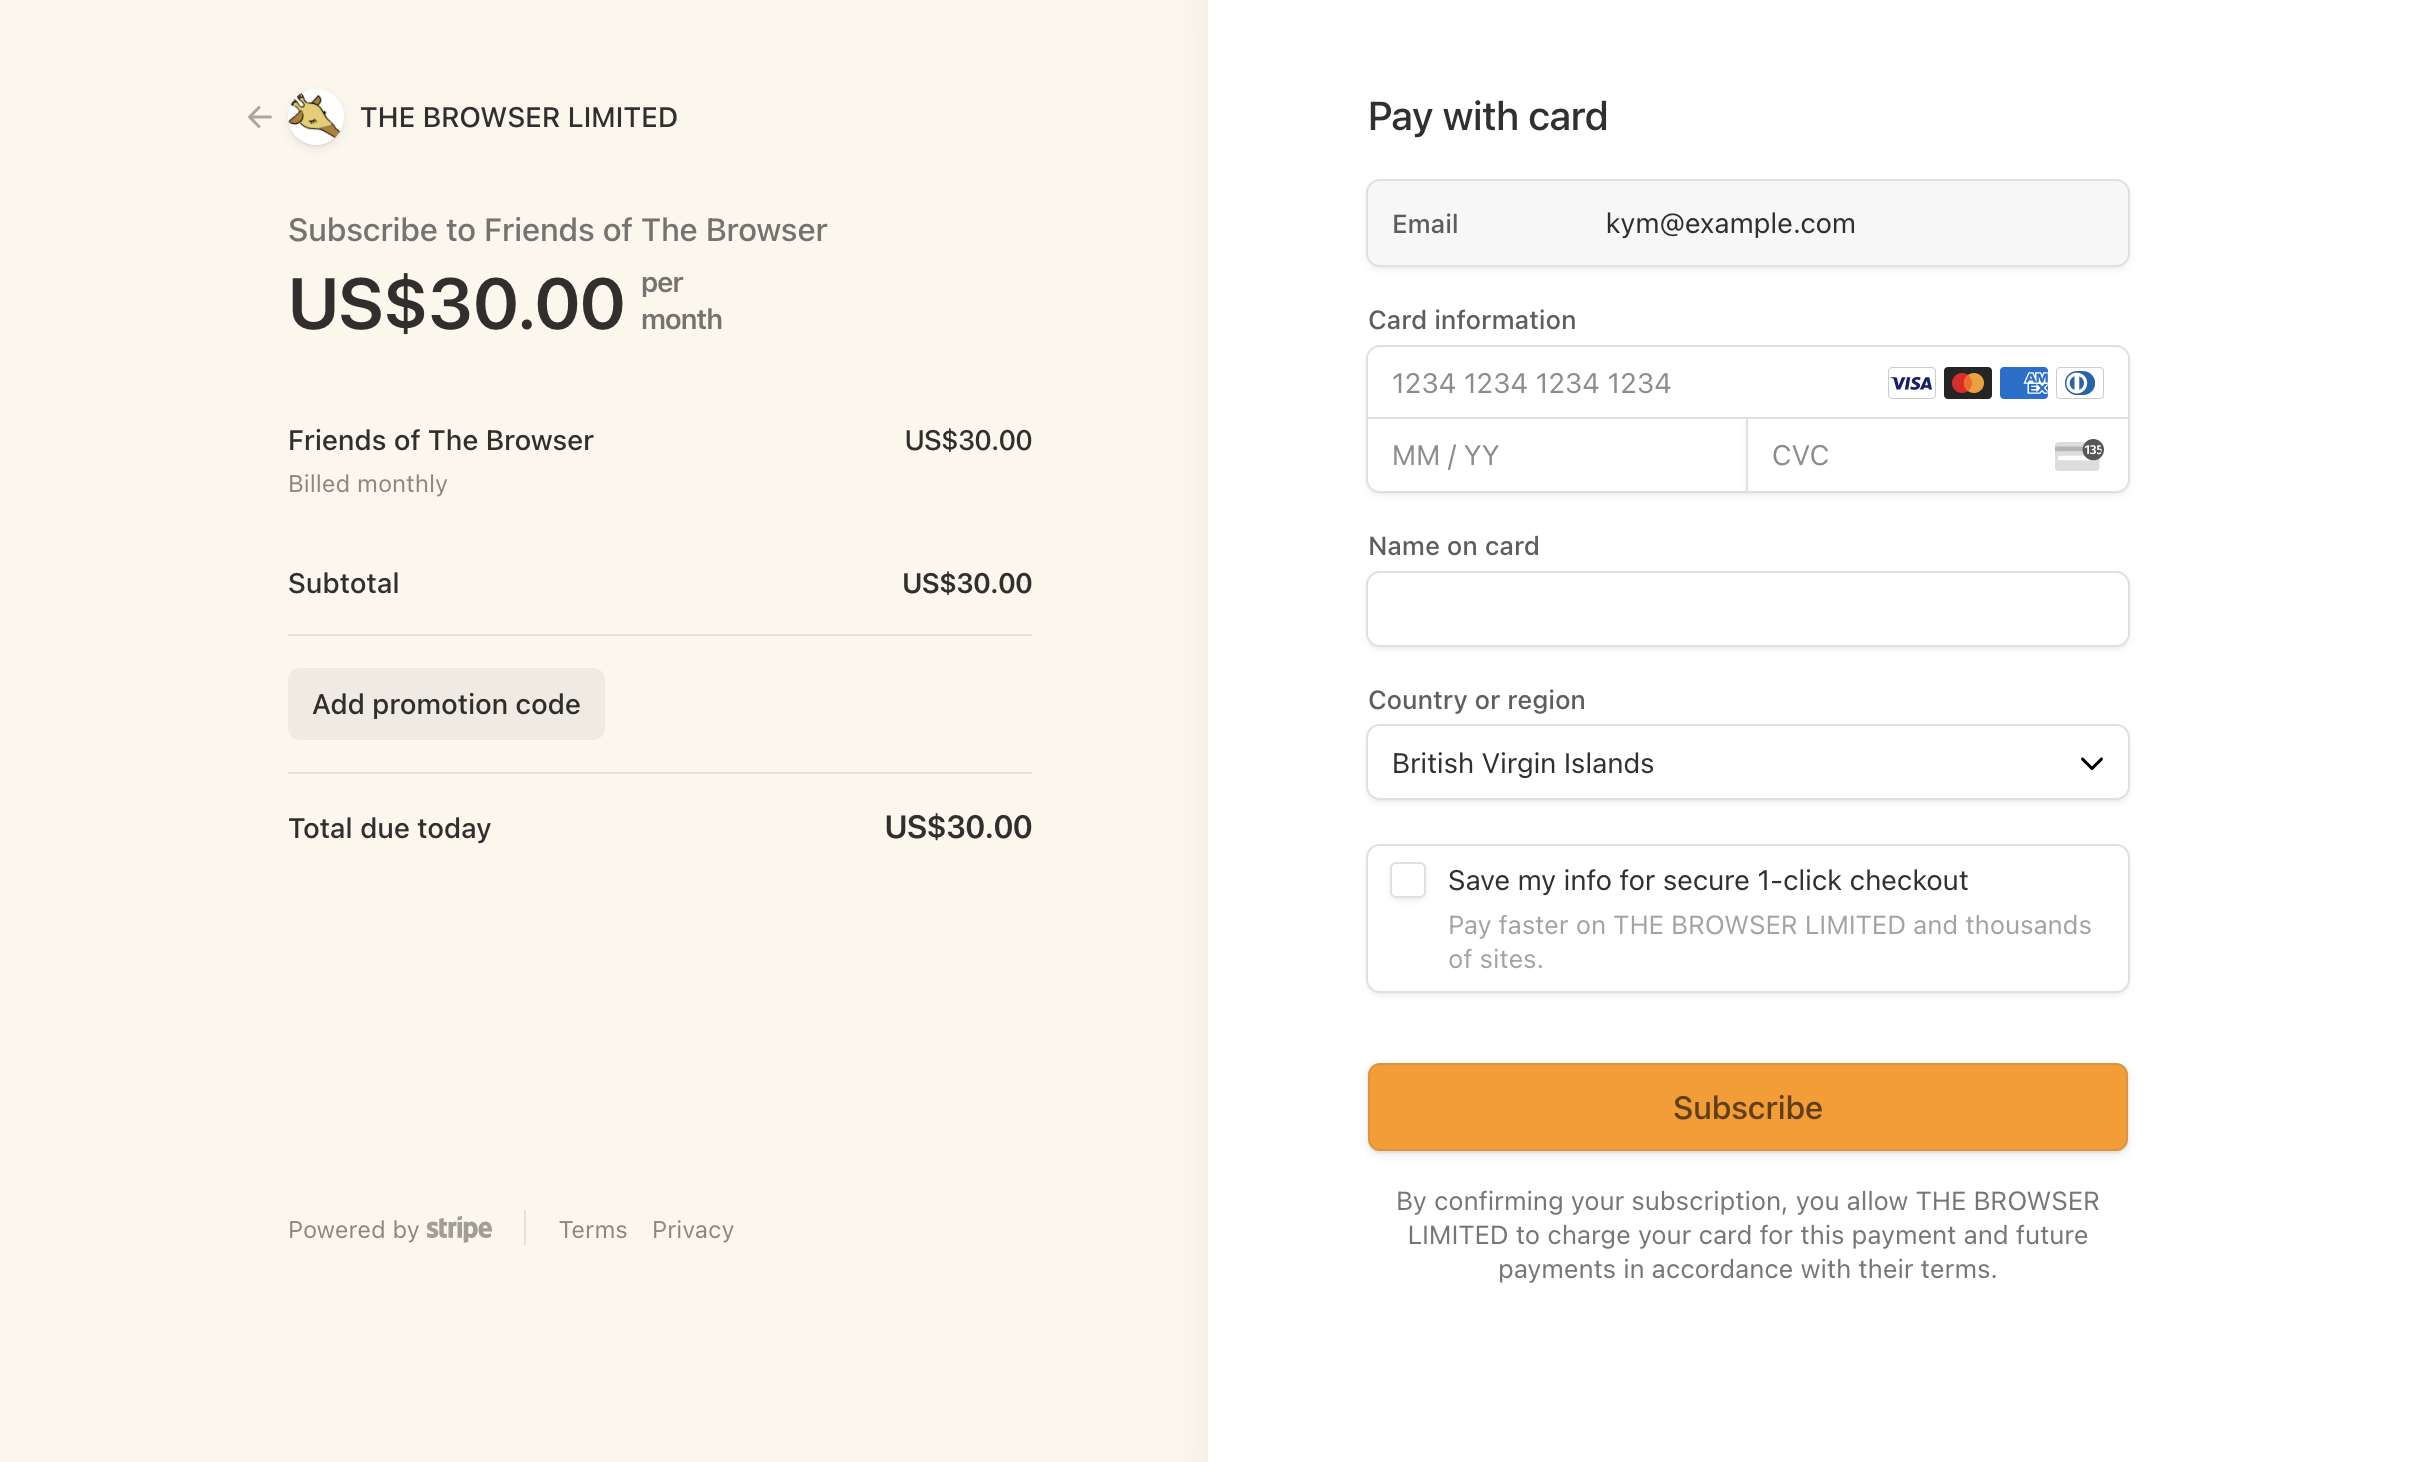
By default, the Stripe checkout page — the page where visitors land when they choose to subscribe to your content — will have a default appearance:
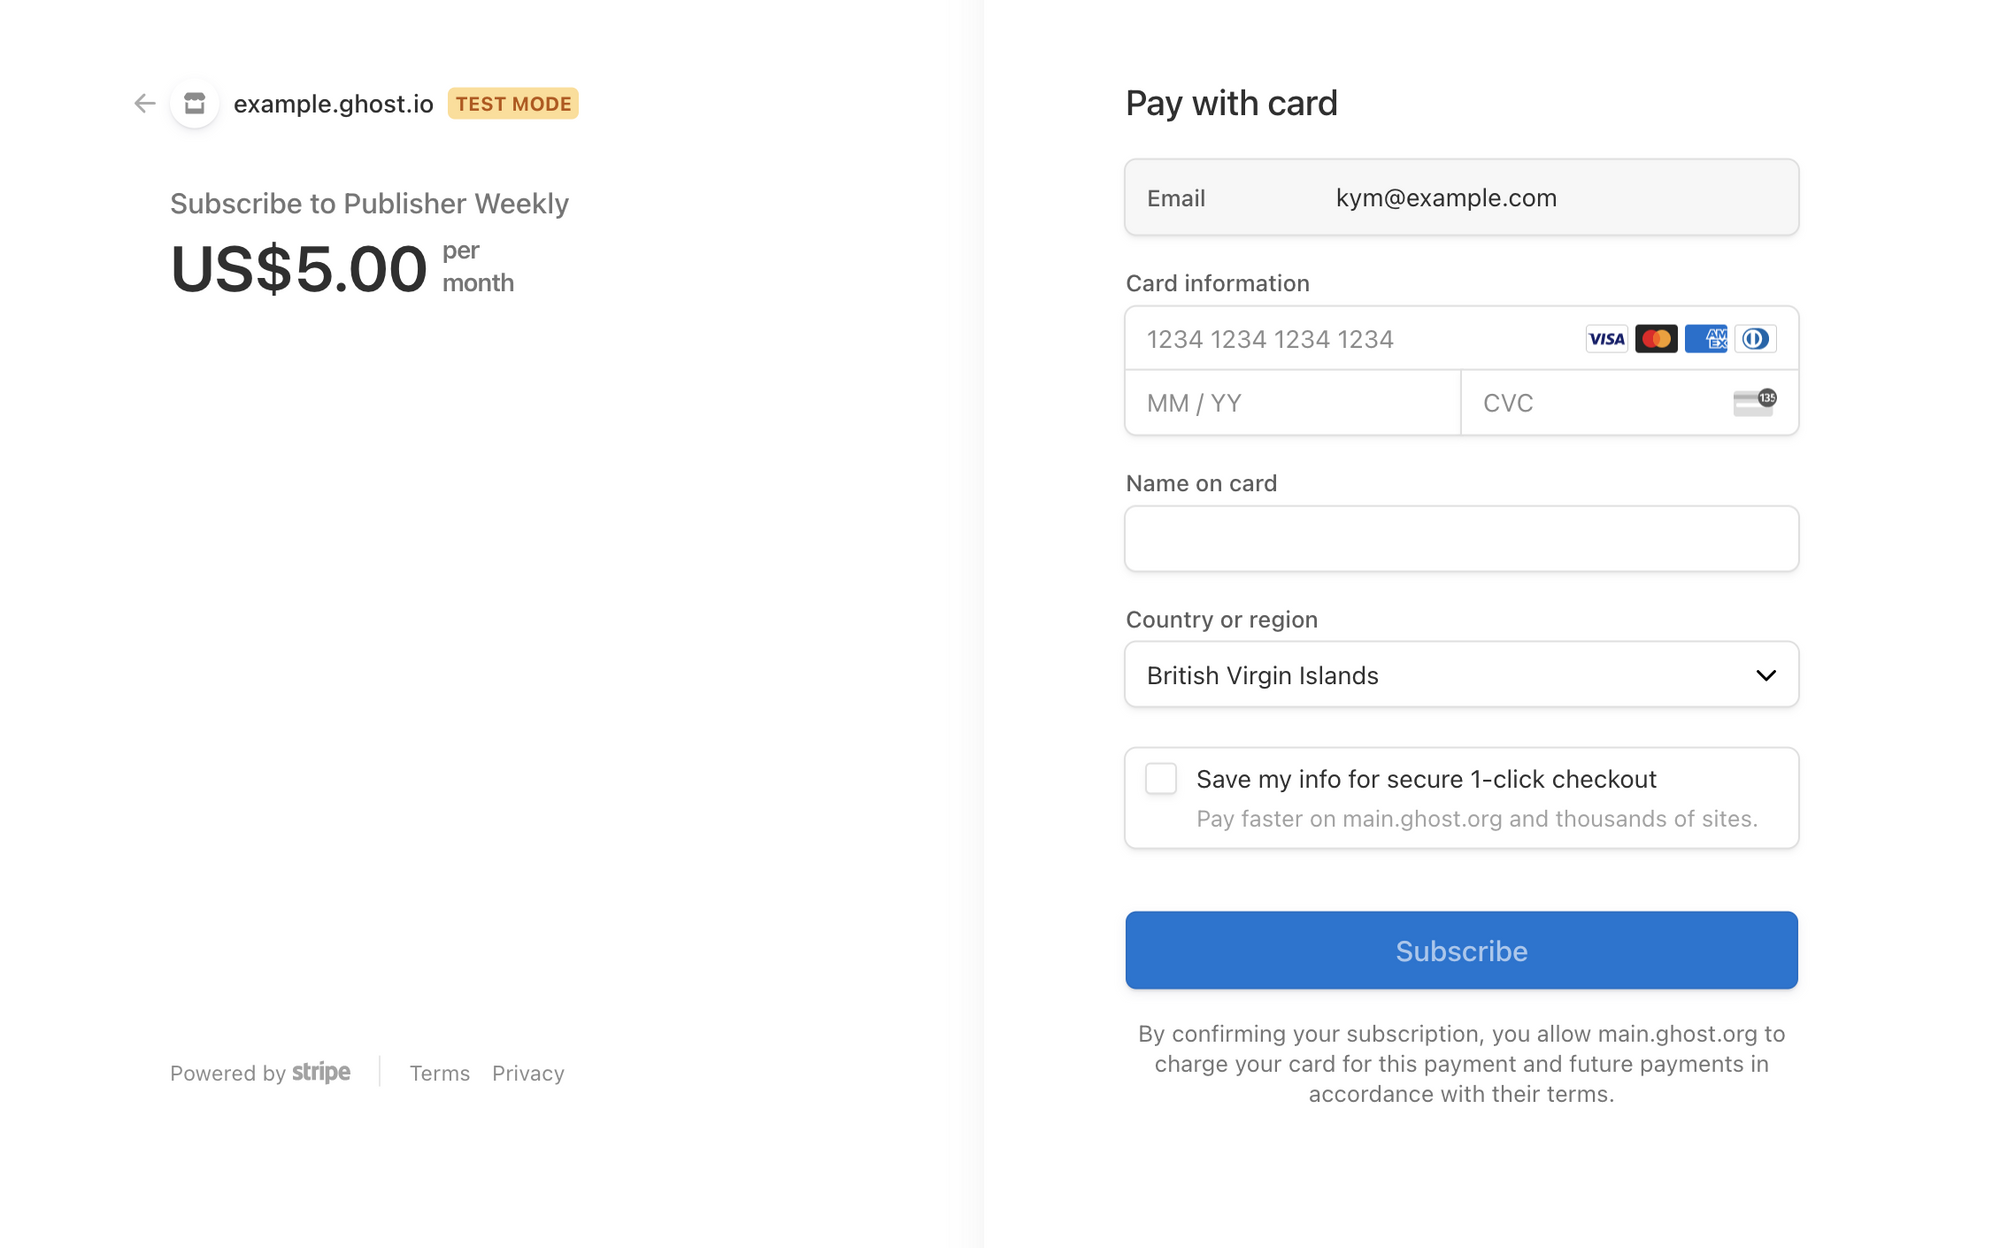
However, you can update this checkout page to include your branding from your Stripe dashboard:
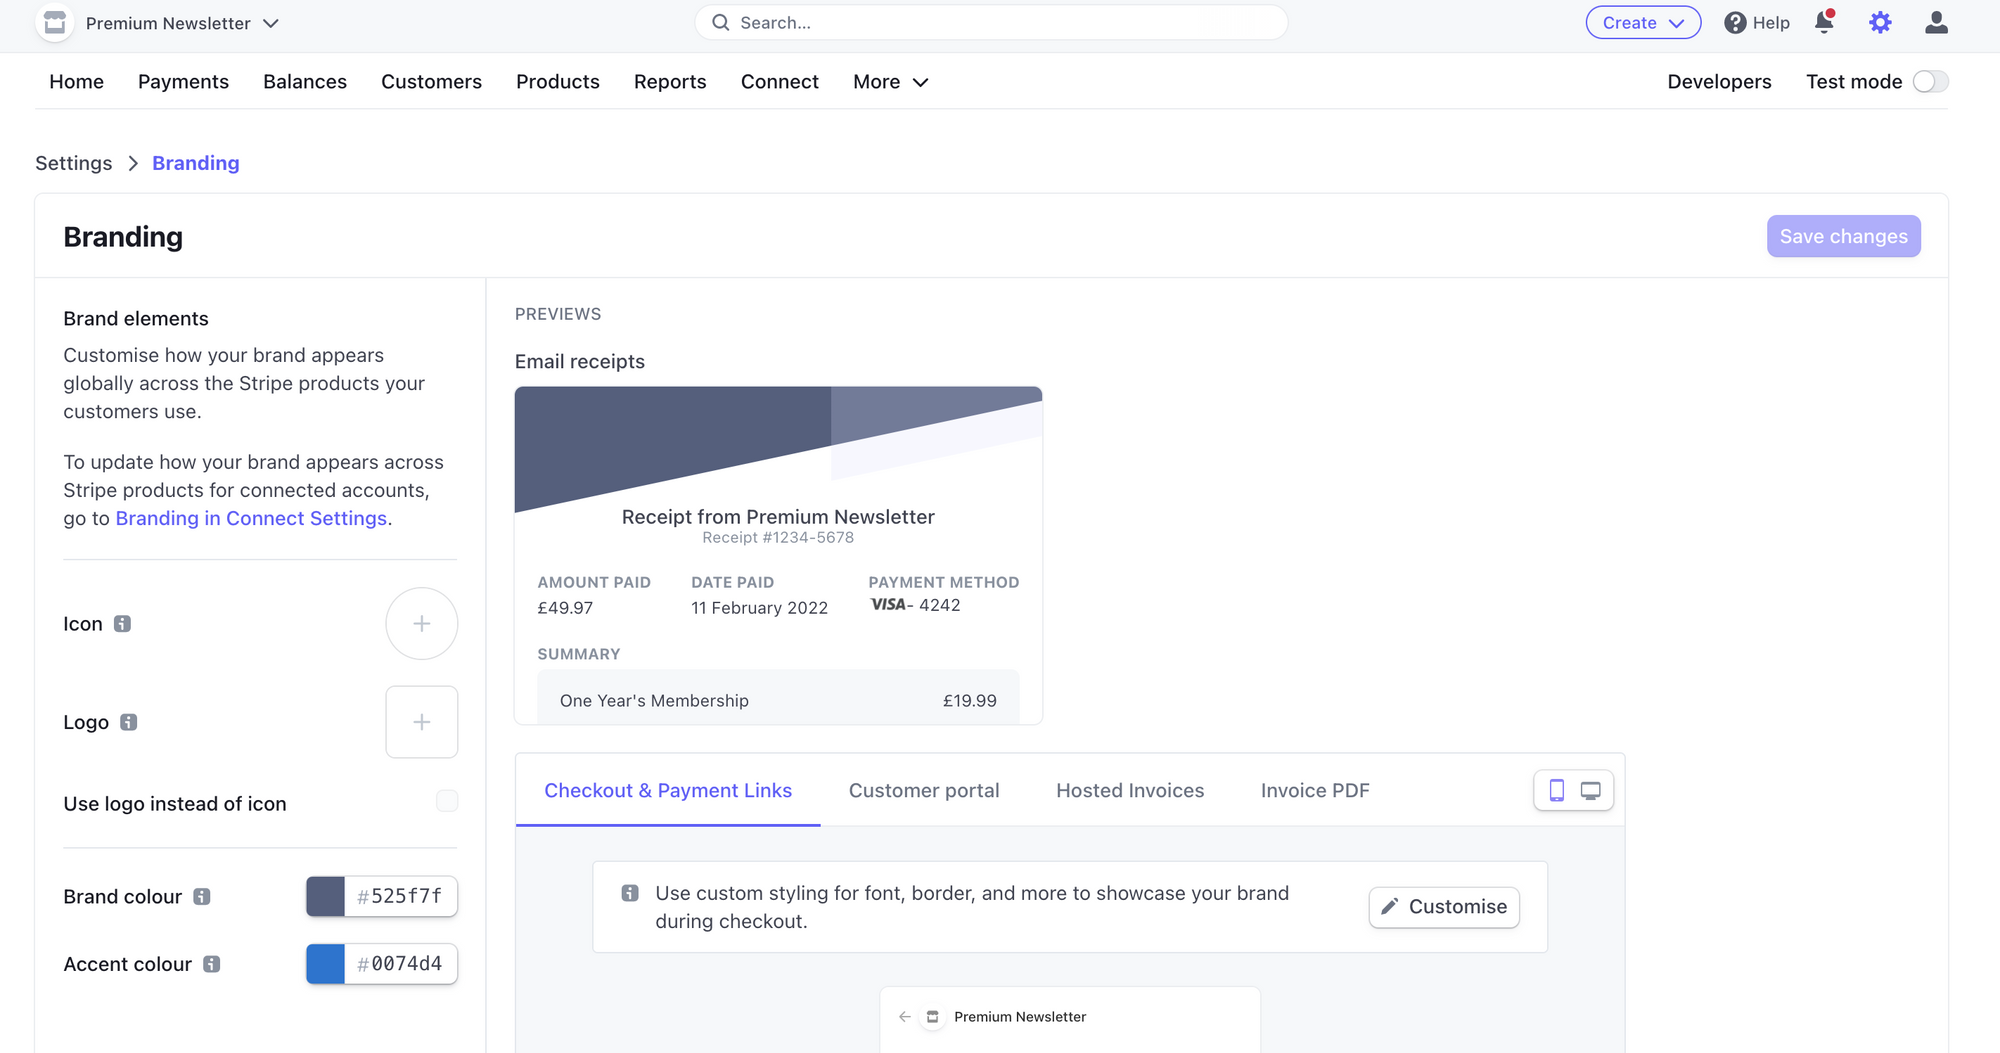
This allows you to add an icon, logo, and accent colors to give your Stripe checkout page more personality.
#2 Set up email receipts
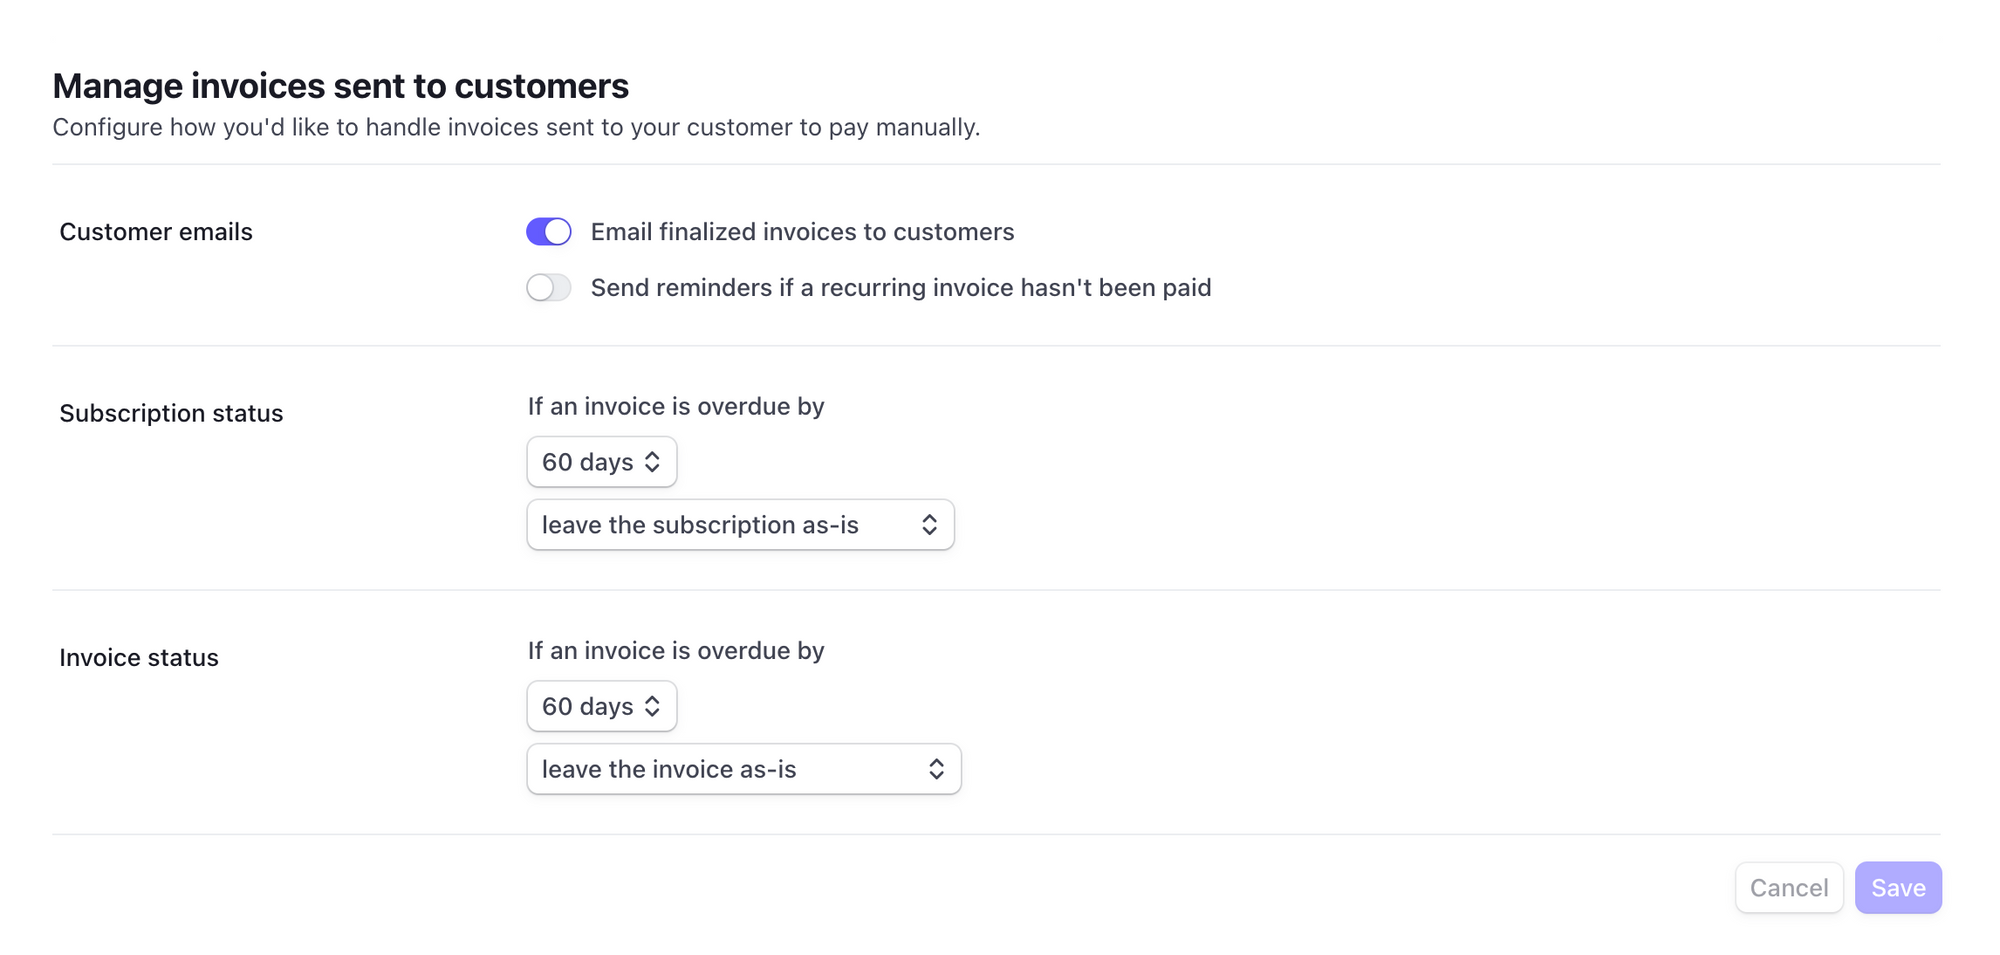
It’s best practice to deliver email receipts with an invoice to customers every time they make a payment. Thankfully, Stripe has a feature that handles this for you, and the automated emails use the brand settings you have already put in place from the previous tip. 🎉
To set this up, head to the Billing page and ensure that Email finalized invoices to customers is checked:
#3 Apply discounts
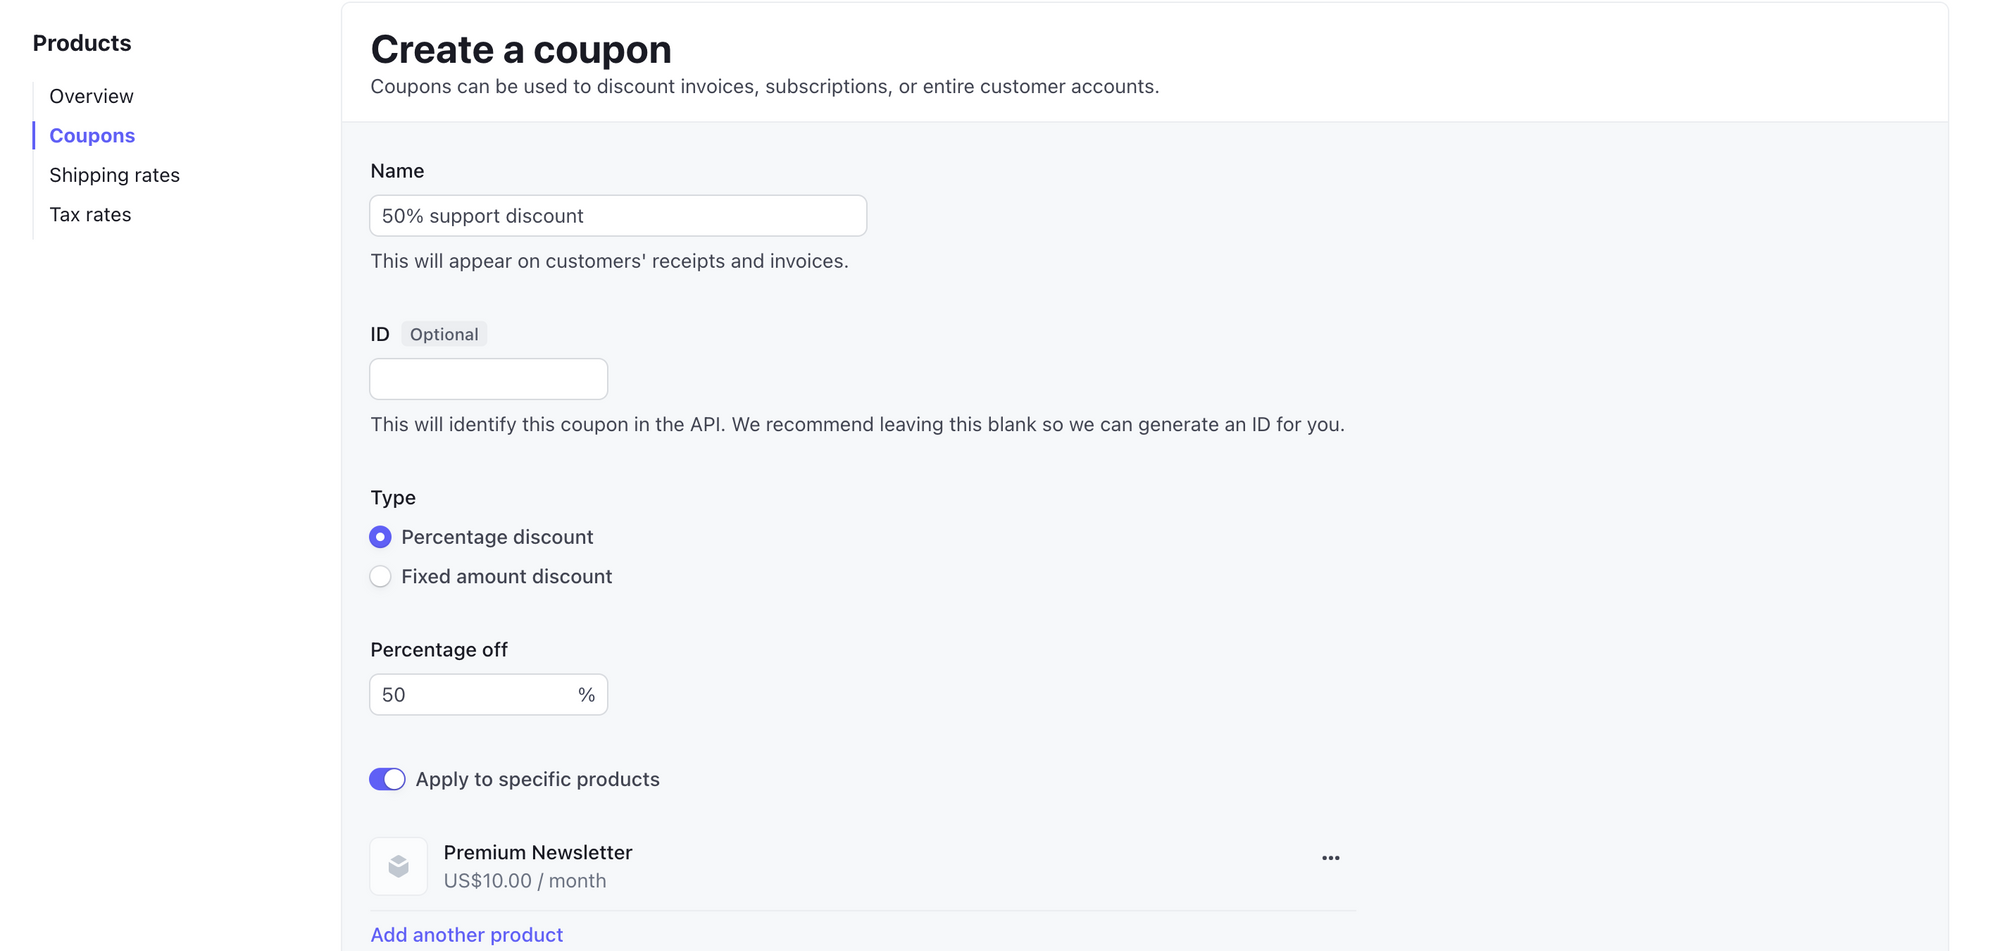
Knowing how to apply a discount to an existing customer’s subscription will help you manage several scenarios. For example, you may want to create short-term discounts for specific groups of customers or offer a discount as a gesture of goodwill in a support scenario.
First, create a coupon in the Products section:
Next, find the customer to whom you’d like to apply a discount by searching for their email address. Open up their customer information in the dashboard and navigate to Apply coupon from the Actions menu:

Then, select the coupon you created from the menu and apply it. You can also use these same steps to revoke a coupon if necessary.

#4 Providing refunds
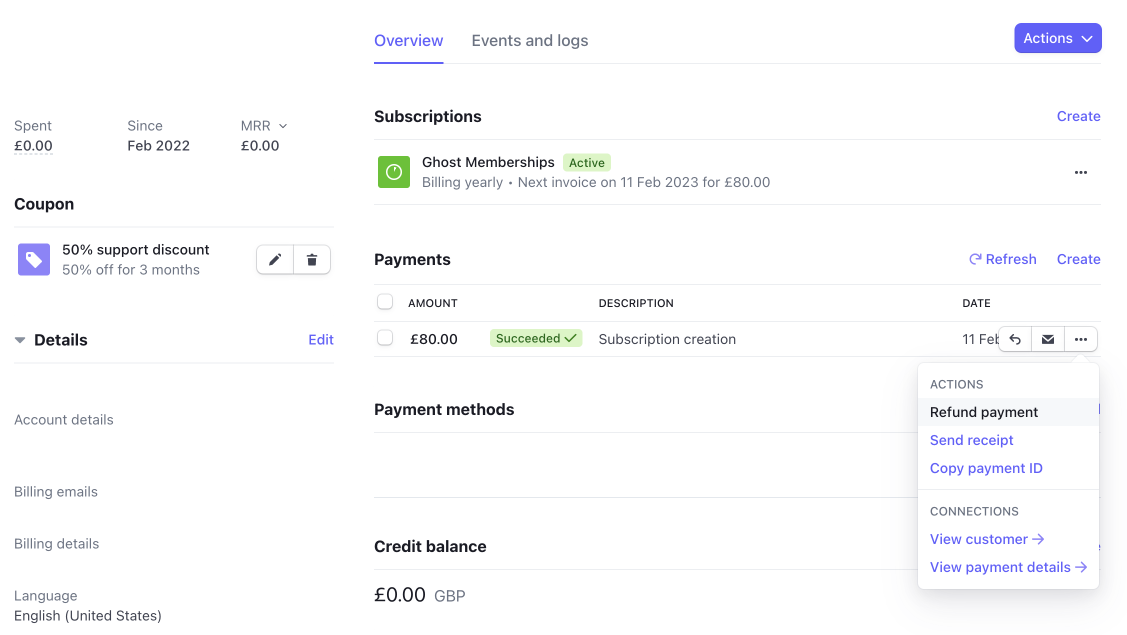
Handling refunds in Stripe is a crucial admin task for support scenarios. To process a refund, locate the customer's profile from the Stripe dashboard. Under the Payments section, click the three dots to open the actions menu and select Refund payment.
The refund screen asks for a reason for the refund, which can be useful for your records. Choose a reason if applicable and hit the Refund button.
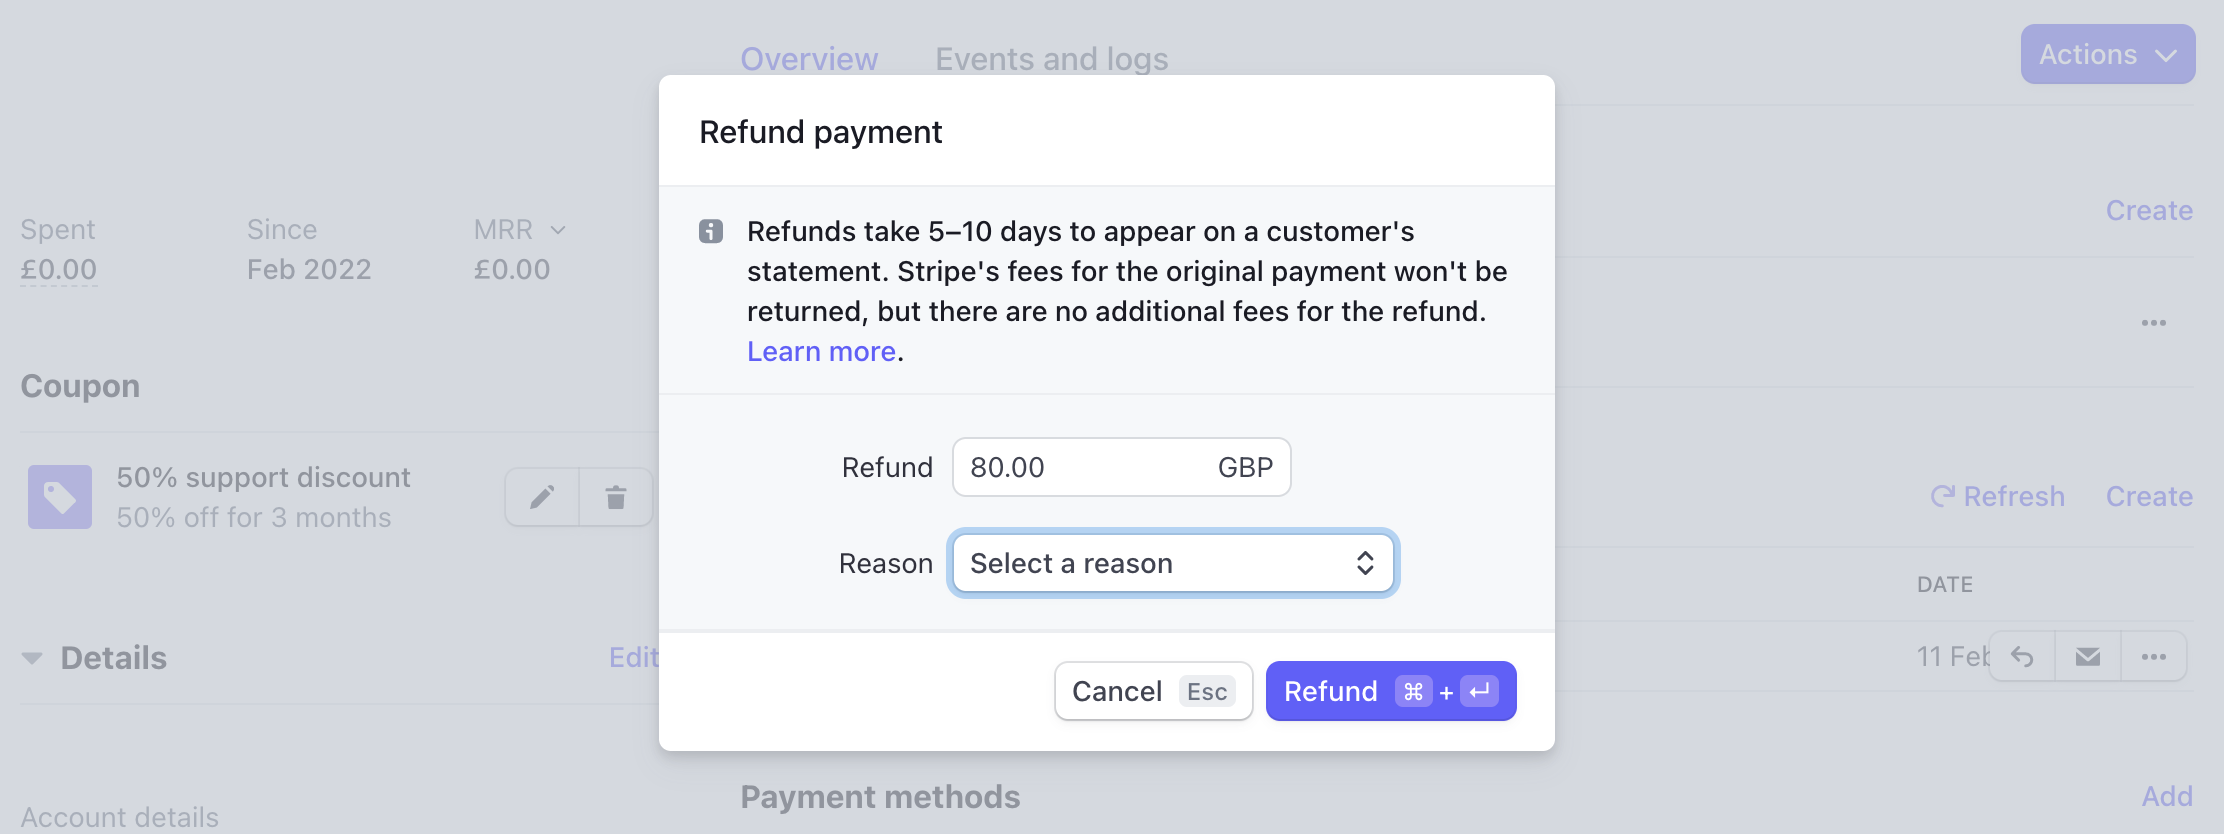
After you process the refund, be sure to let your customer know that it can take 5-10 business days to appear on their statement.
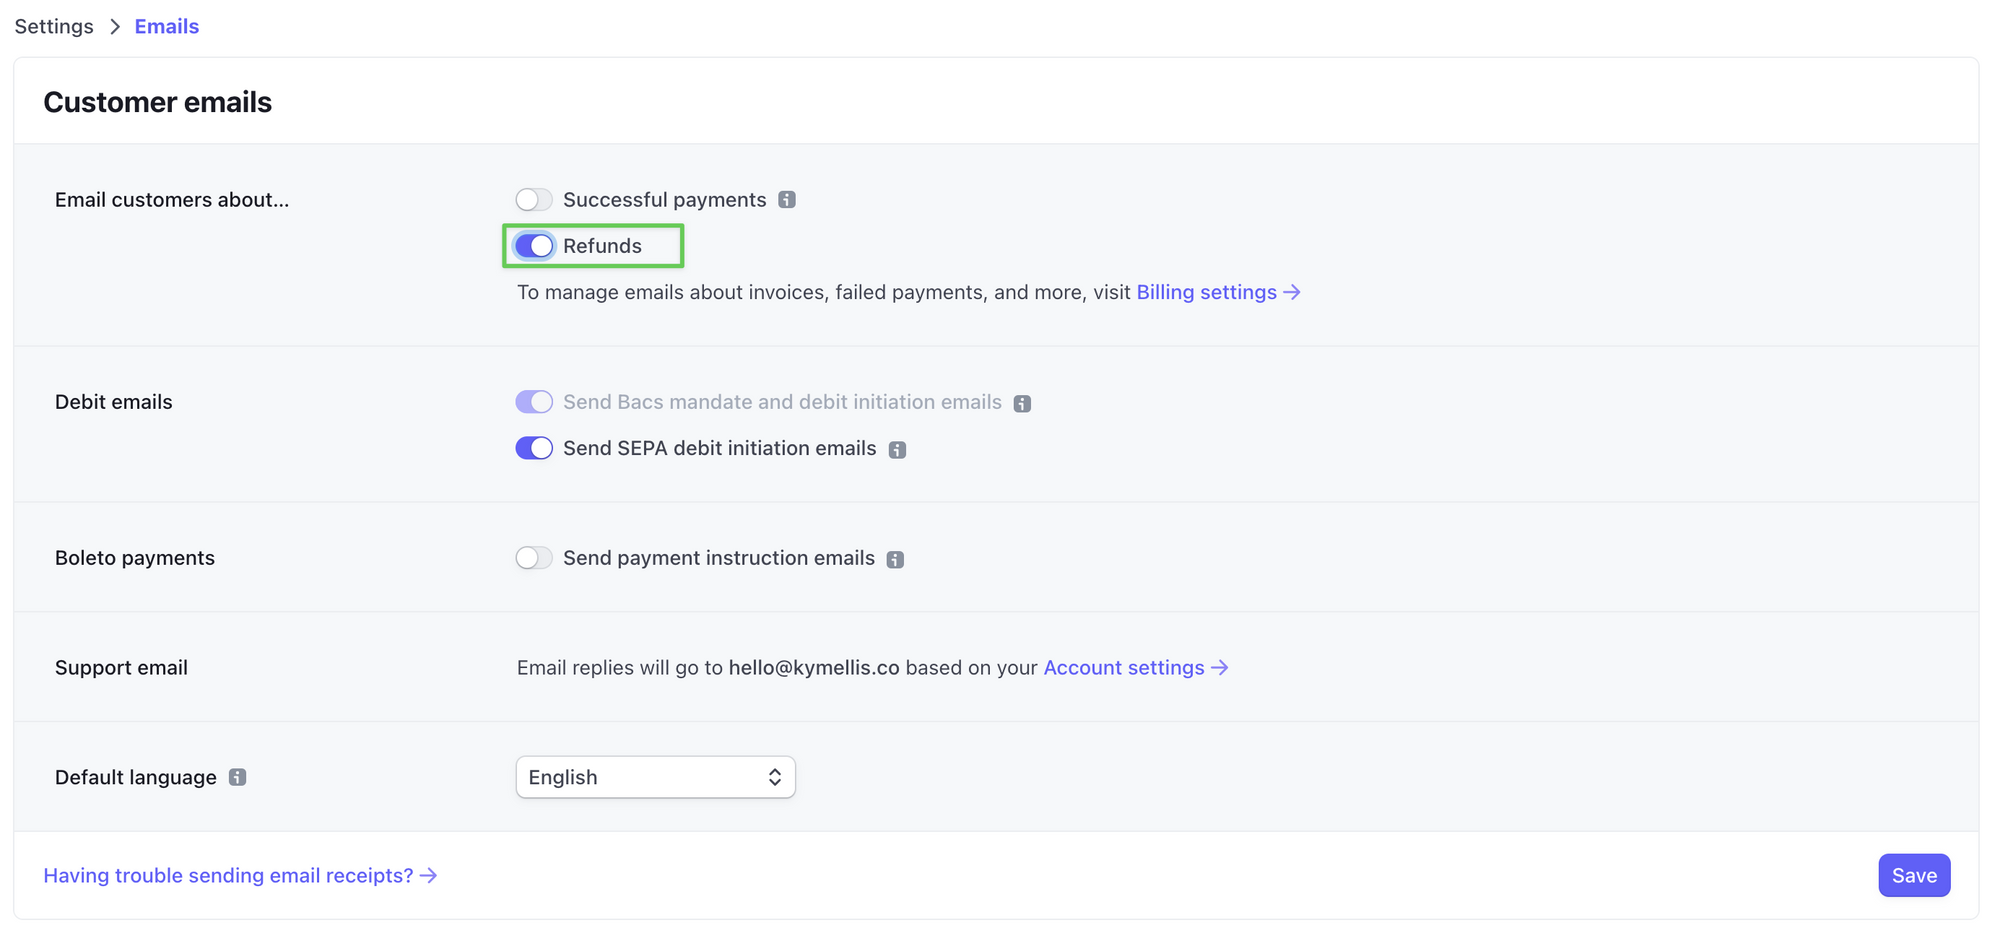
You can also have Stripe automatically deliver refund notification emails by updating your email settings:
#5 Connect ChartMogul
While Stripe has its own billing metrics feature, you may want to consider additional tools that will help analyze your business performance.
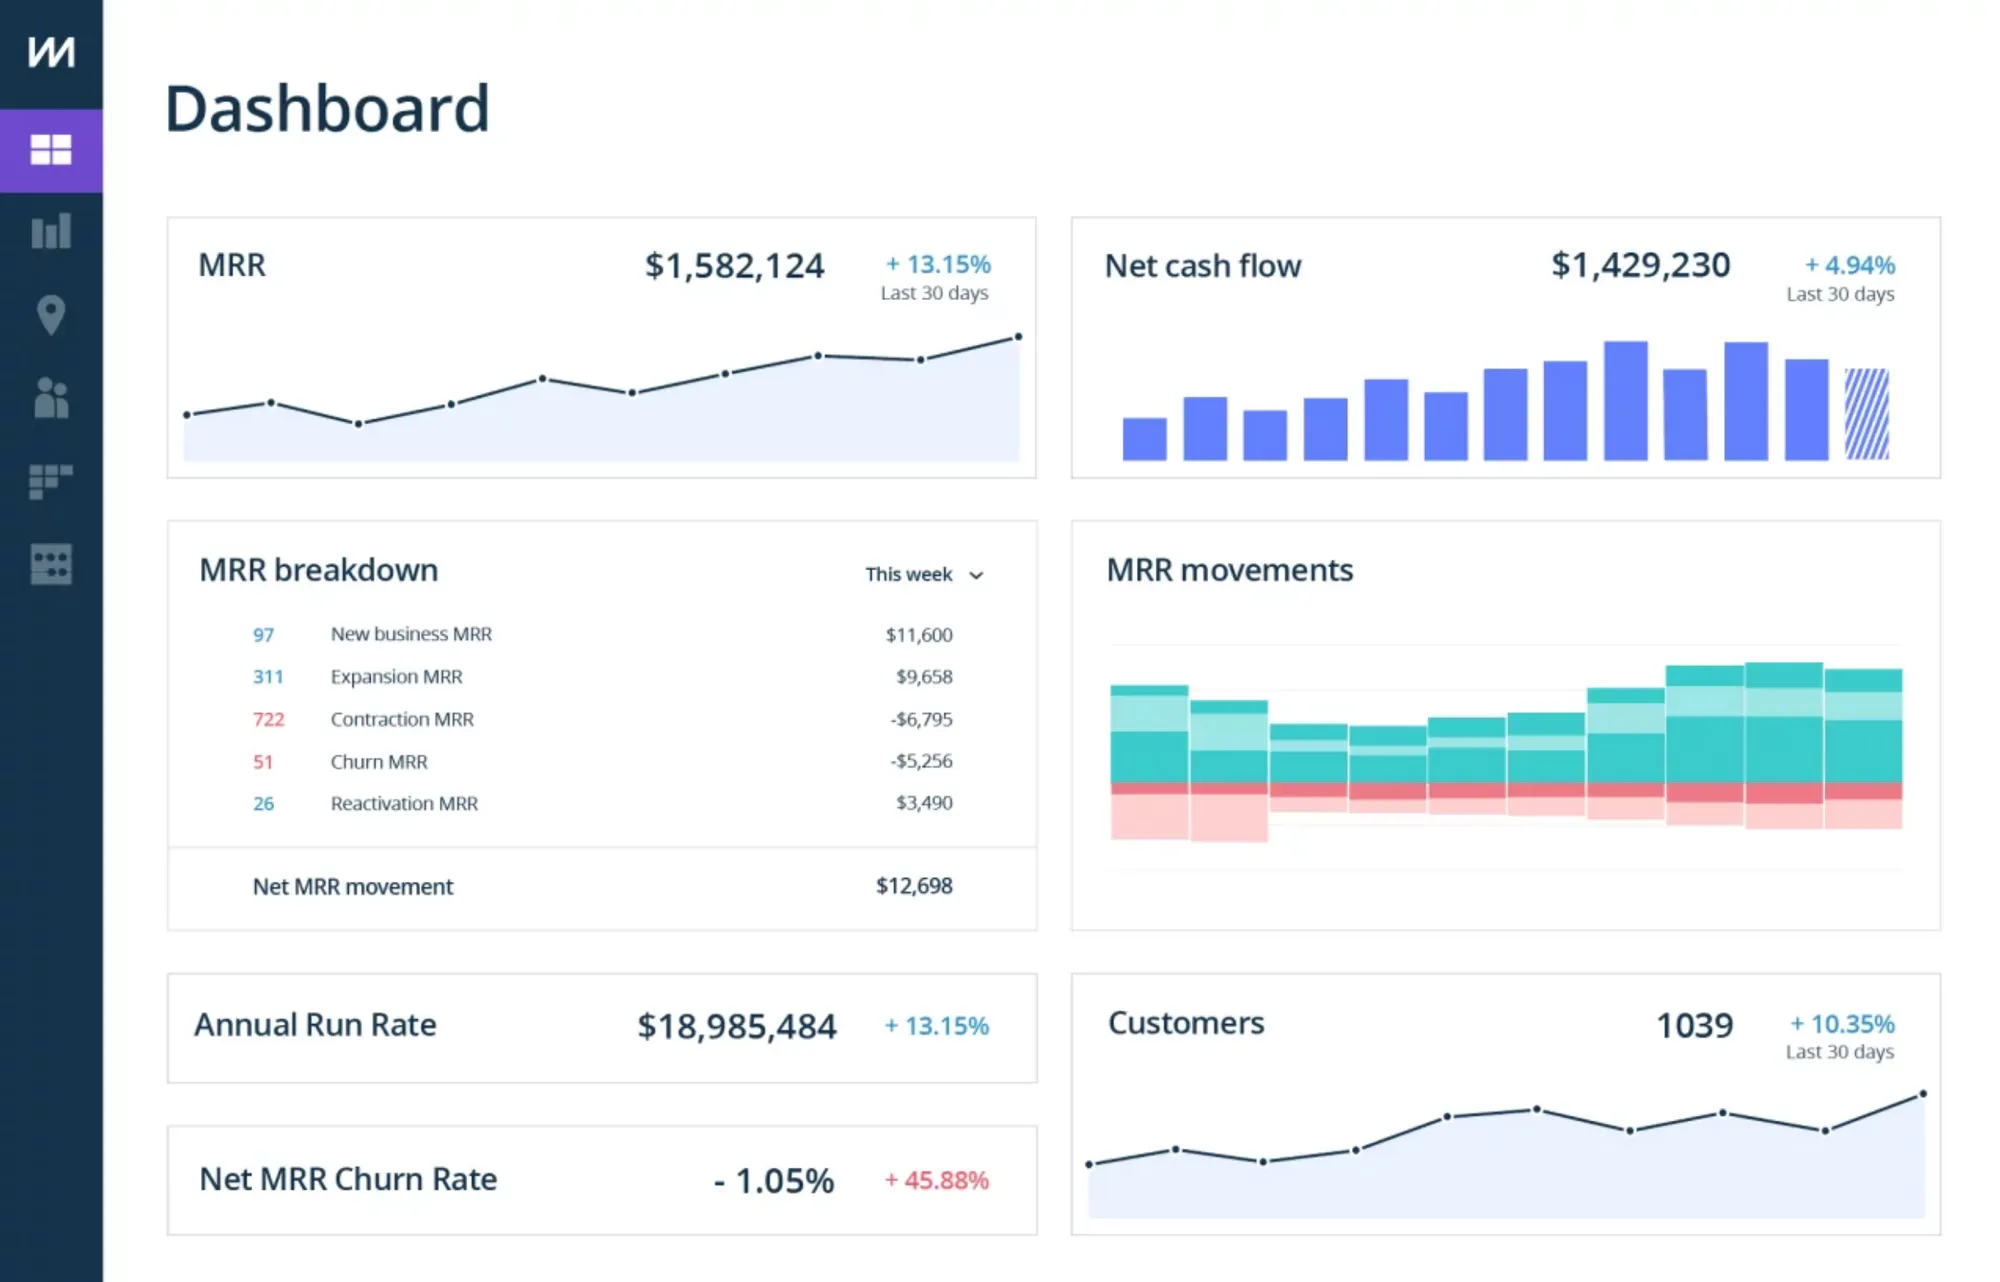
A platform like ChartMogul can help you do this. Creating a ChartMogul account is free for users with less than $120K in MRR (monthly recurring revenue), so you can get started immediately.
The ChartMogul dashboard offers a clean, visual way to monitor business performance over time:
Learn more about the business metrics that matter in this resource:
 David Ramos
#6 Keep your business finances in check
For an easier way to manage your finances, we recommend creating a brand new bank account for your business and connecting that bank account to Stripe.
Stripe has launched some tax features, but they are not yet suitable for a no-code setup with external platforms. As always, the best course of action is to seek professional legal and accounting advice at your discretion.
#7 Minimize churn
In subscription commerce, churn reveals the percentage of people who stop being customers, whether by unsubscribing or canceling their product.
However, not all customers churn because they made a conscious decision to leave. Many will churn passively for several reasons, including credit card expirations, failed payments, processor problems, or fraud protection.
Passive churn can make up a significant amount of your overall churn rate since your customers often don’t realize their subscription payments have failed. For this reason, subscription businesses opt to implement strategies to minimize this type of churn:
- Consider a dedicated dunning service, like Churnbuster, which integrates directly with your Stripe account.
- Dunning is the practice of business owners communicating with customers to remind them of payments due. Tools like Churnbuster help automate this process and create personalized emails for failed payments.
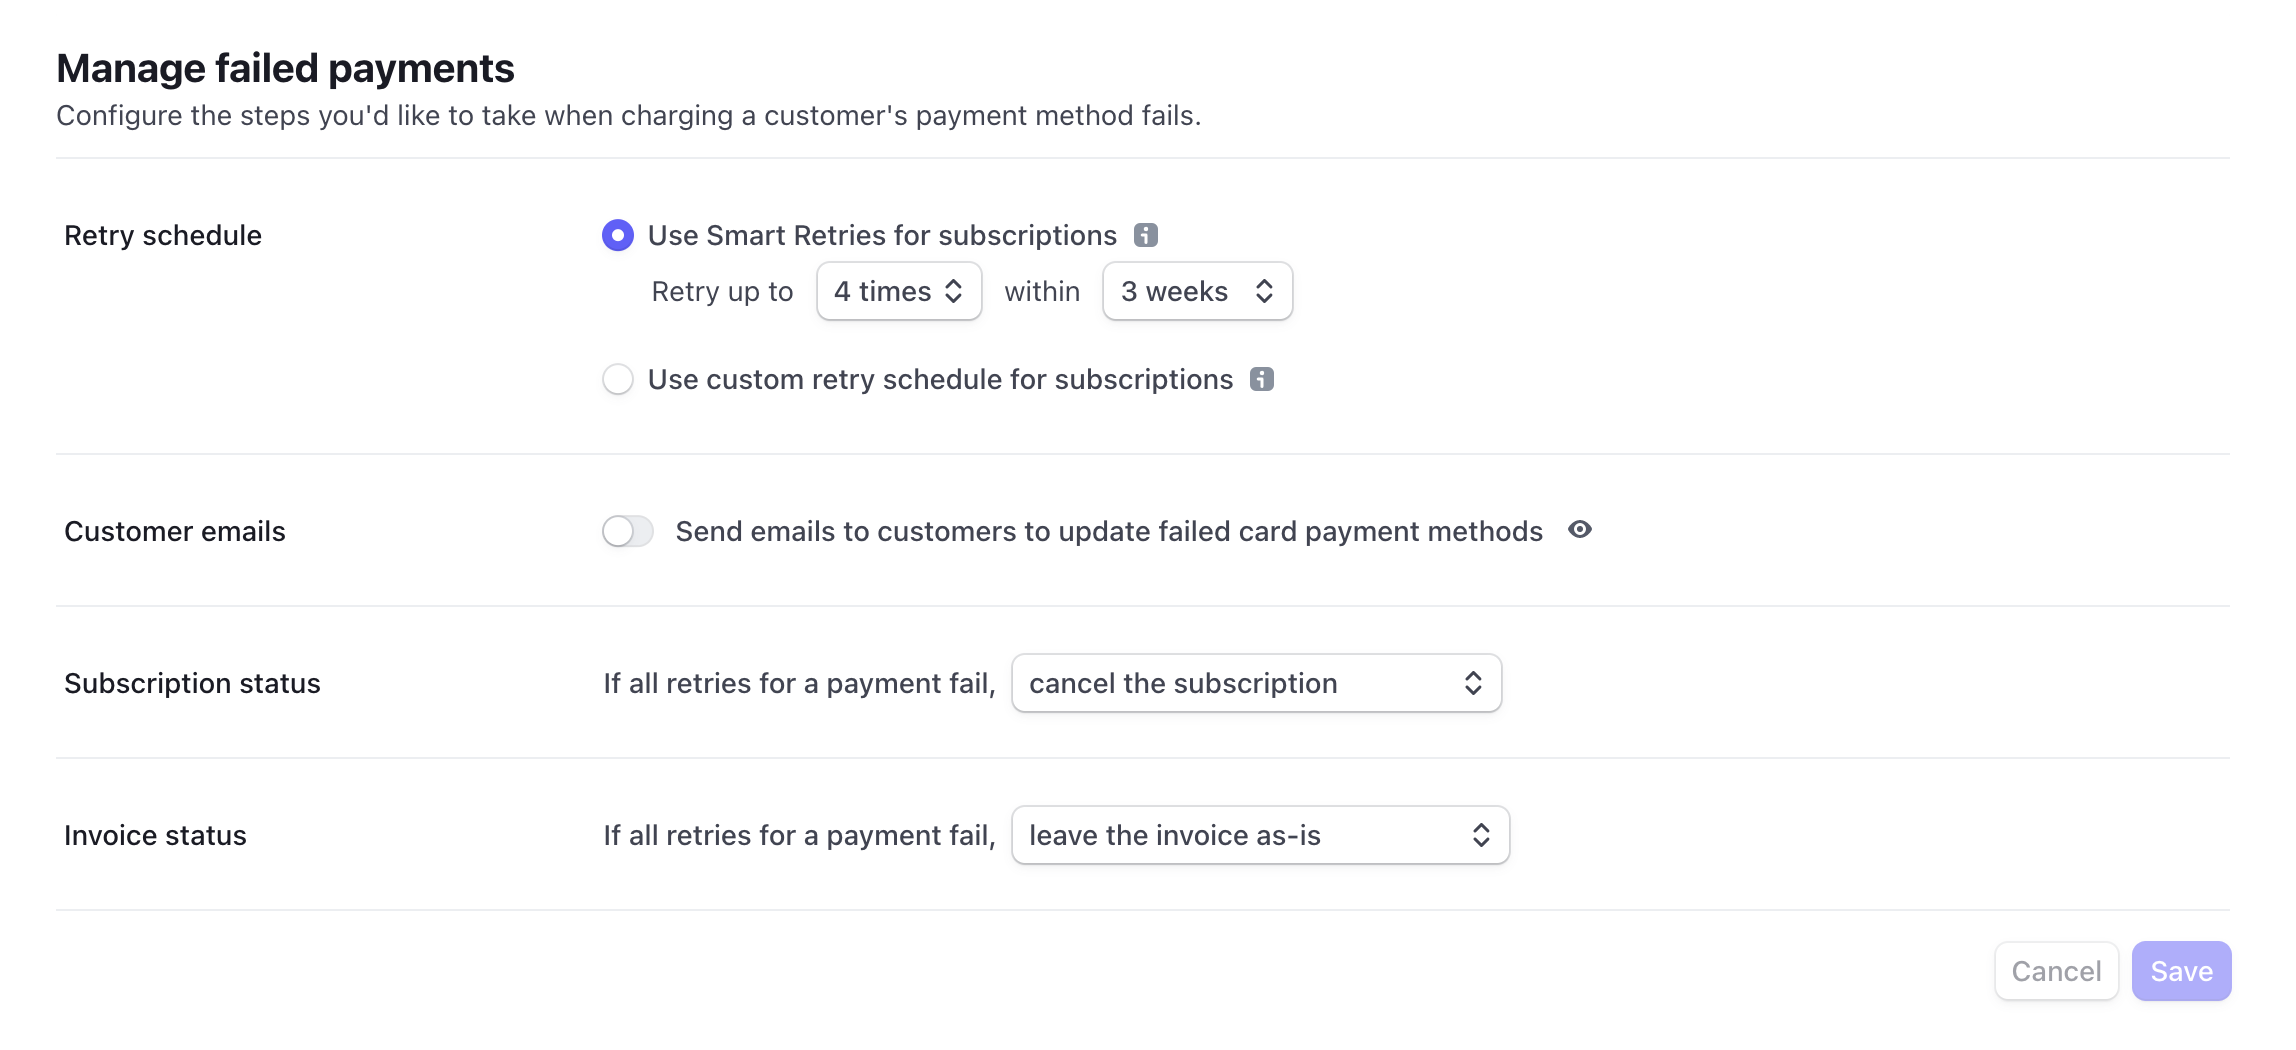
- Stripe has native features that define parameters for how you’d like to manage failed payments, like Smart Retries and automated emails for failed card payment methods, which you can find in the Billing section.
#8 Ensure you understand Stripe's policies
Consider reviewing Stripe's tipping policy and prohibited and restricted business policy. Content and activities that violate these rules are against Stripe’s SSA. Please familiarize yourself with their policies to ensure you do not accept tips or donations for anything prohibited or restricted.