Integrating Transifex into a large-scale web application
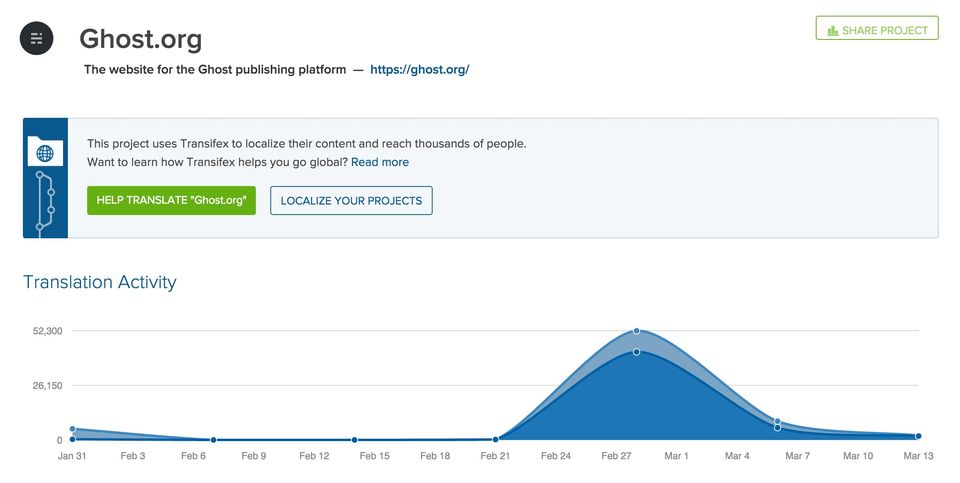
Last week we announced that Ghost.org is now open for business translation. It was a long process to get here, so I thought it would be interesting to share some of the finer details around how we made this possible. Ghost.org has some 600,000 users from over 170 countries, and about 50%(!) of our traffic is from non-English users.
Being an open source project which is largely built and supported by its community, it was really important for us to do this in a way which would be open for everyone to participate in. We didn’t just want to release a few localisations of our site, we wanted to open it up to be translated by anyone. (The same thing we hope to do for Ghost itself, in future!)
Last summer we made friends with the wonderful team over at Transifex, and ever since then we’ve been talking to them keenly about how we can provide fully internationalised versions of all our content.
This January, I started working for the Ghost Foundation - and took on the task of turning the plans into a reality.
Here’s how we did it.
Transifex translation options
Transifex offers three different ways to translate your content.
- Transifex Live - A JavaScript library which allows easy point-and-click translation of any site, with a slick GUI.
- Transifex API - a way to automate all translations remotely and integrate directly into an application.
- Transifex Client - a command line tool which uses the API to manage translation files within a project.
Transifex Live is the simplest and most comfortable way to translate content. Hands down. There’s literally no work required beyond including a JavaScript snippet on a page. Translators can then point-and-click on bits of the page they want to translate. While readers visiting that page subsequently have the localised version loaded in. Slick.
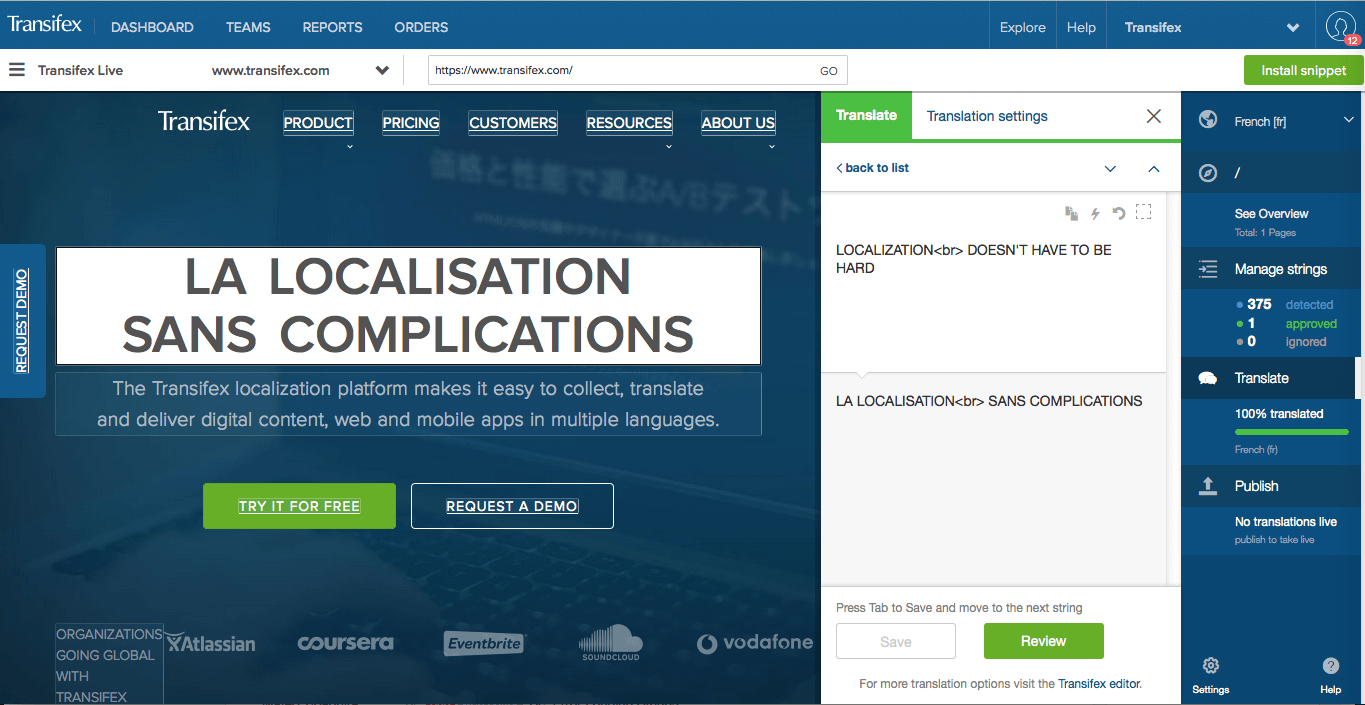
But. It does come with a couple of drawbacks. Performance: As a reader, you have to wait for JS to load in your translations on each pageload. SEO: Translations only exist in JS, so Google can’t crawl them (though Transifex have some interesting workarounds for this). Authentication: Translators translate pages by being on those pages. So it can be tough for them to actually get to all of the errors, billing and authentication flows.
So we wanted to integrate translations directly into the Ghost.org app, and be able to serve them on their own routes (/de/, /nl/, etc). If Ghost.org changed very frequently in content, it would’ve made sense to do a deep integration with the Transifex API for maximum automation. But it doesn’t. So we just use the Transifex CLI locally and push changes when needed.
Preparing the application
Ghost.org is a Ruby on Rails application, so step one was to get things ready by following the Rails internationalisation instructions. Before translating a project, you have to decide how you’re going to do string-harvesting, which is the process of pulling all of your English snippets of text out of your application and into a set of files to be sent off for translation. Transifex supports a variety of file formats.
Installing the Transifex Client
The next step is to install and initialise the Transifex client. As the Client is written in Python, it’ll run on most systems and is installed with pip quite simply:
$ easy_install pip
$ pip install transifex-client
It’s also possible to install the Client directly from GitHub. And more documentation on client setup, definitely comes in handy.
Creating a new project
You can’t create a new project via the command line. So, before initialising your project, you have to create one in the Transifex UI. After that, we’re able continuing to inititialise it in the CLI.
$ tx init
Creating .tx folder…
Transifex instance [https://www.transifex.com]:
Just press Enter, it’s not recommended to change the host name.
Creating skeleton…
Creating config file…
Done.
Configuring the Client
To use the client, you’ll have to configure two files:
~/.transifexrc
The ~/.transifexrc file is unique per user and stores the hostname, username and password. You’ll find it in your home directory. Replace user and p@ssw0rd with your own details and save it.
[https://www.transifex.com]
username = user
token =
password = p@ssw0rd
hostname = https://www.transifex.com
.tx/config
transifex-client uses a per project configuration file to store the project’s details and the file-to-resource mappings. This file is stored in .tx/config of your project’s root directory. It has the following outline:
[main]
host = https://www.transifex.com

[project_slug.resource_slug]
source_file = po/myproj.pot
source_lang = en
type = PO
file_filter = po/<lang><lang>.po
trans.fi = translations/fi/LC_MESSAGES/django.po
You can find further description in the Client documentation. In our case, the file looks like this:
[main]
host = https://www.transifex.com

[ghost-org.ghost]
file_filter = config/locales/ghost/<lang>.yml
source_file = config/locales/ghost/en.yml
source_lang = en
type = YAML

…
While ghost-org is our project_slug, ghost will be our resource_slug. The resource can represents a part of your website. For a small project, it’s ok to use just one resource, but for a bigger project like Ghost.org is, it’s highly recommended to reflect your projects directory. For example, if you have a project like this:
Home
> Product
> About
  > Team
  > Jobs
> Contact
Your translation files should be stored in the same way (the path config/locales is the default path in Ruby on Rails, yours might be different):
config
  > locales
    > Home
      > Product
      > About
      > Contact
And you’ll have resources like:
- Home
- Project
- About
- Contact
Replacing strings with helpers
Once your translation files (in our example, they’re en.yaml-files) are filled up, the next step is to push them to Transifex and start translating.
The next step will show you, how to replace a single string in Ruby on Rails with a translation helper. If you’re using a different programming language or framework, you’ll have to check, how to mark strings for translation and export them to supported files.
In Ruby on Rails is looks like this:
<p><%= t(‘home_welcome’) %></p>
<p><%= t(‘home_with_html’) %></p>
We configure the application to look for these helpers in the *.yaml files. So in our en.yaml-file, you’d find:
en:
  home_welcome: ‘Welcome’
  home_with_html: ‘Click <a href=“#”>here</a> for more info!’
This means, the helper home_welcome will be replaced with Welcome. You can even include HTML just by using the suffix _html in name of your helper.
Now rinse and repeat for literally every single piece of text in your entire project. Enjoy! (trollface)
This part takes a long time and is one of the biggest reasons why it’s a good idea to add i18n support EARLY.
Now it’s time to push them to Transifex!
Uploading source translation files to Transifex
From your project root, push source files to Transifex with
$ tx push -s
Any new recourses will be created as soon as they’re defined in the .tx/config-file and contain a translation file with content.
More docs about uploading source files to Transifex, here.
Translate and review in Transifex Dashboard
Now we’ve pushed all of our English strings to Transifex, which can then proceed to make them available for translation.
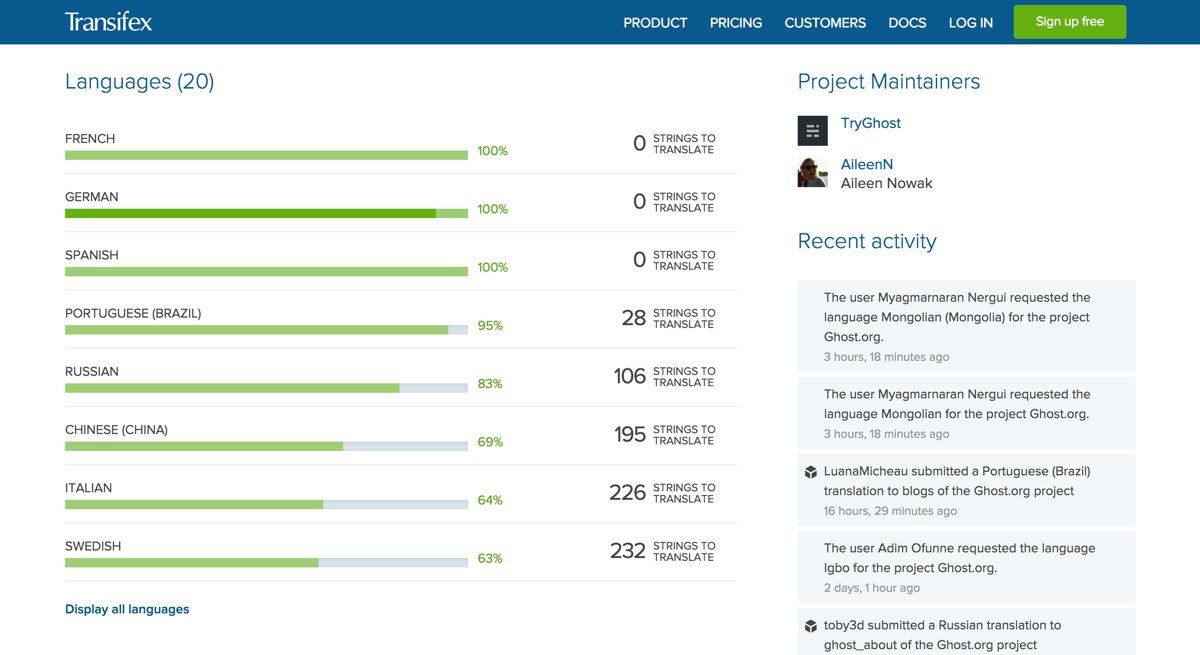
You can choose the languages you want to have your source files translated to in your project settings.
Then, in the Transifex Dashboard you (or, more likely, somebody else) can start translating each string and submit it for review.
Downloading translated files
Alright, so you’ve got all your English strings up on Transifex, and they’ve been successfully translated into a new language. Now we need to get them back and put them into the application, so they can be deployed to the live site.
To download all strings, run
$ tx pull -a
This will return not only the translated strings, but also non-translated strings. Strings which aren’t translated yet will be returned in the source language. This is helpful if a particular language is incomplete. Some parts will be localised and anything that isn’t will just appear in its original language. It’s a simple fallback for the helpers when they don’t know what to do.
So a German translation file with our original strings comes back looking something like this:
de:
  home_welcome: ‘Willkommen’
  home_with_html: ‘Klicke <a href=“#”>hier</a> für weiter Informationen!’
You can also tell Transifex to only download reviewed/approved translations by running:
$ tx pull —mode=reviewed
There are way more options for downloading the files from Transifex, which you can find here.
Implementing a language switch
Now we’re at a point where we’ve harvested English strings, sent them for translation, and gotten back the translated versions of our content. Next step: Figure out how to deploy all of these languages within our app, and allow users to switch between them. Sound easy? Not so fast.
Ghost.org is configured to show locale in the URL, as long as it’s not our default locale, which is en. For example:
- ghost.org/about/ — English
- ghost.org/de/about/ — German
English people can go to one URL, Germans can go to another. Simple, but we can do better.
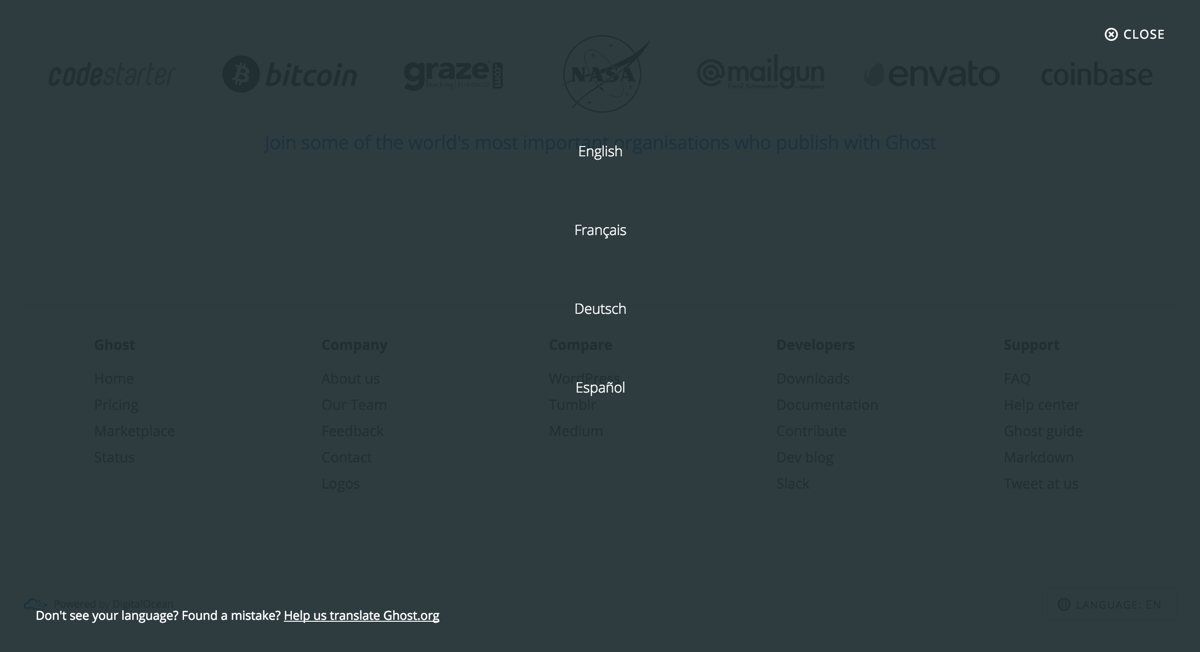
- First, read the user’s browser locale. If we support their language, give them that language automatically.
- Second, add a language switcher in the footer so users can determine what they’d like to use.
- Third, set a cookie which remembers their selection. This overrides steps 1 and 2. So if your browser is in German and you visit Ghost.org - you’ll always see it in German. Unless you change it to English, then we’ll remember that and show you English.
tl;dr: try to make language selection as automatic as possible whilst still retaining the ability for the user to override all automation to avoid being annoying.
Note: It’s vastly more useful to detect browser language than user location. Just because a user is in Germany doesn’t necessarily mean they speak German.
See the magic happen
Having done all of this, you can now see it all in action on Ghost.org. German is the first language that we have fully translated, but thanks to Transifex’s Crowdsourcing feature, there are literally hundreds of people translating the site into other languages right now.

As languages are completed, we’ll use the Transifex client to pull the new files down, and then push them up to Ghost.org and set them live.
Next Steps
We’ve done a lot, but there’s always more to do. A few things we’re thinking about doing next:
- More translations and a better process. We’re still figuring out how to organise (and correctly review) translations for a large number of languages from a large number of contributors.
- More automation. Using the Transifex client to manually push and pull i18n strings is fine for now, but we may want to automate this completely in future using the API.
- Applying the same process to Ghost itself! This is WIP, we’re currently string harvesting. If you want to help, we’d absolutely love a hand. Here’s the Github issue in question.
Thoughts? Questions? Drop us a line below!

